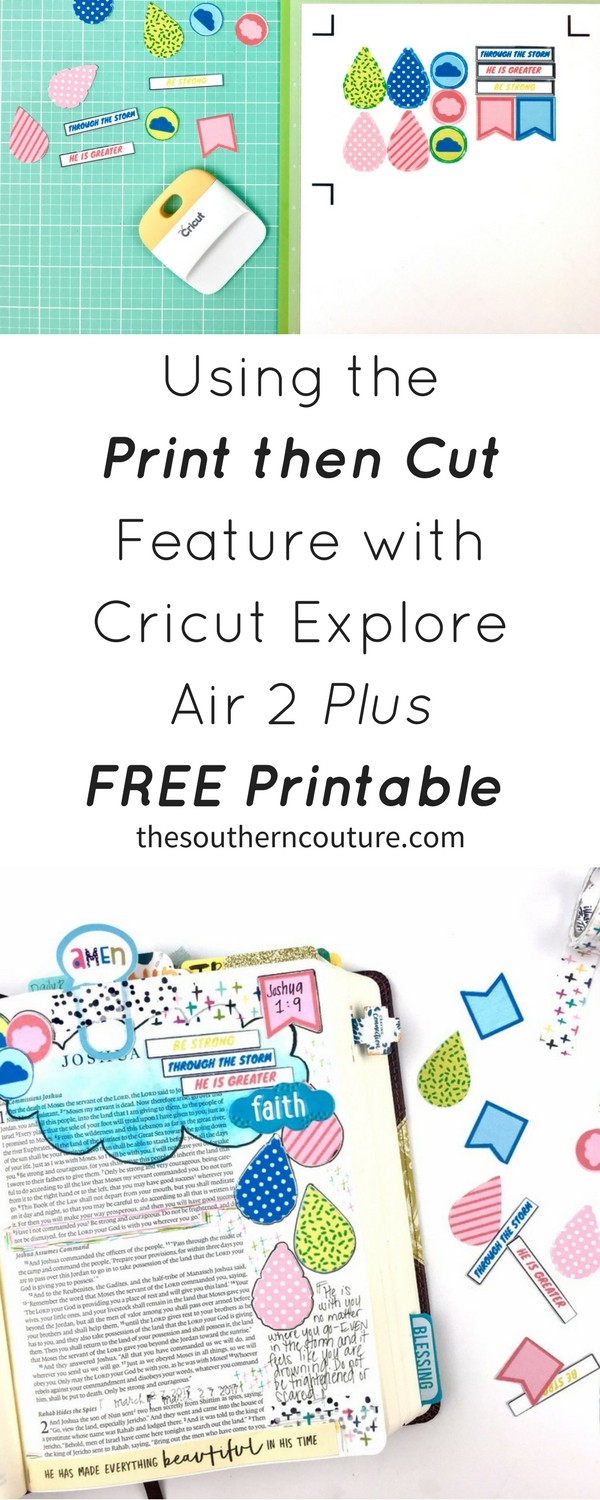
Cut out any design you please and learn how to using the print then cut feature with Cricut Explore Air 2 plus FREE printable.
Over the past two weeks, you have been introduced to the Cricut Explore Air 2 and also have seen just a snippet of what it can do with my “Hangry” apron using iron-on vinyl. Today we are going to explore a whole different concept and project using this same crafting machine. Your mind is about to be blown!
The PRINT THEN CUT Feature
Did you know that you can actually use your printer to print different objects but then have your Cricut machine recognize the printables and cut it out? Well it sure can!! And it’s simple to do. I have step-by-step instructions with screenshots of the Cricut Design Space software to walk you through the whole thing so no worries there.
But before we print then cut, we need something to actually print. You can print using different objects from the Cricut Design Space software or design your own using design software. I love designing my own depending on the occasion specifically for my planner or Bible journaling.
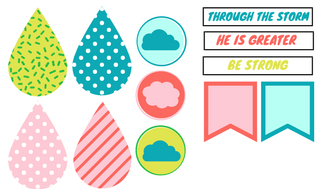
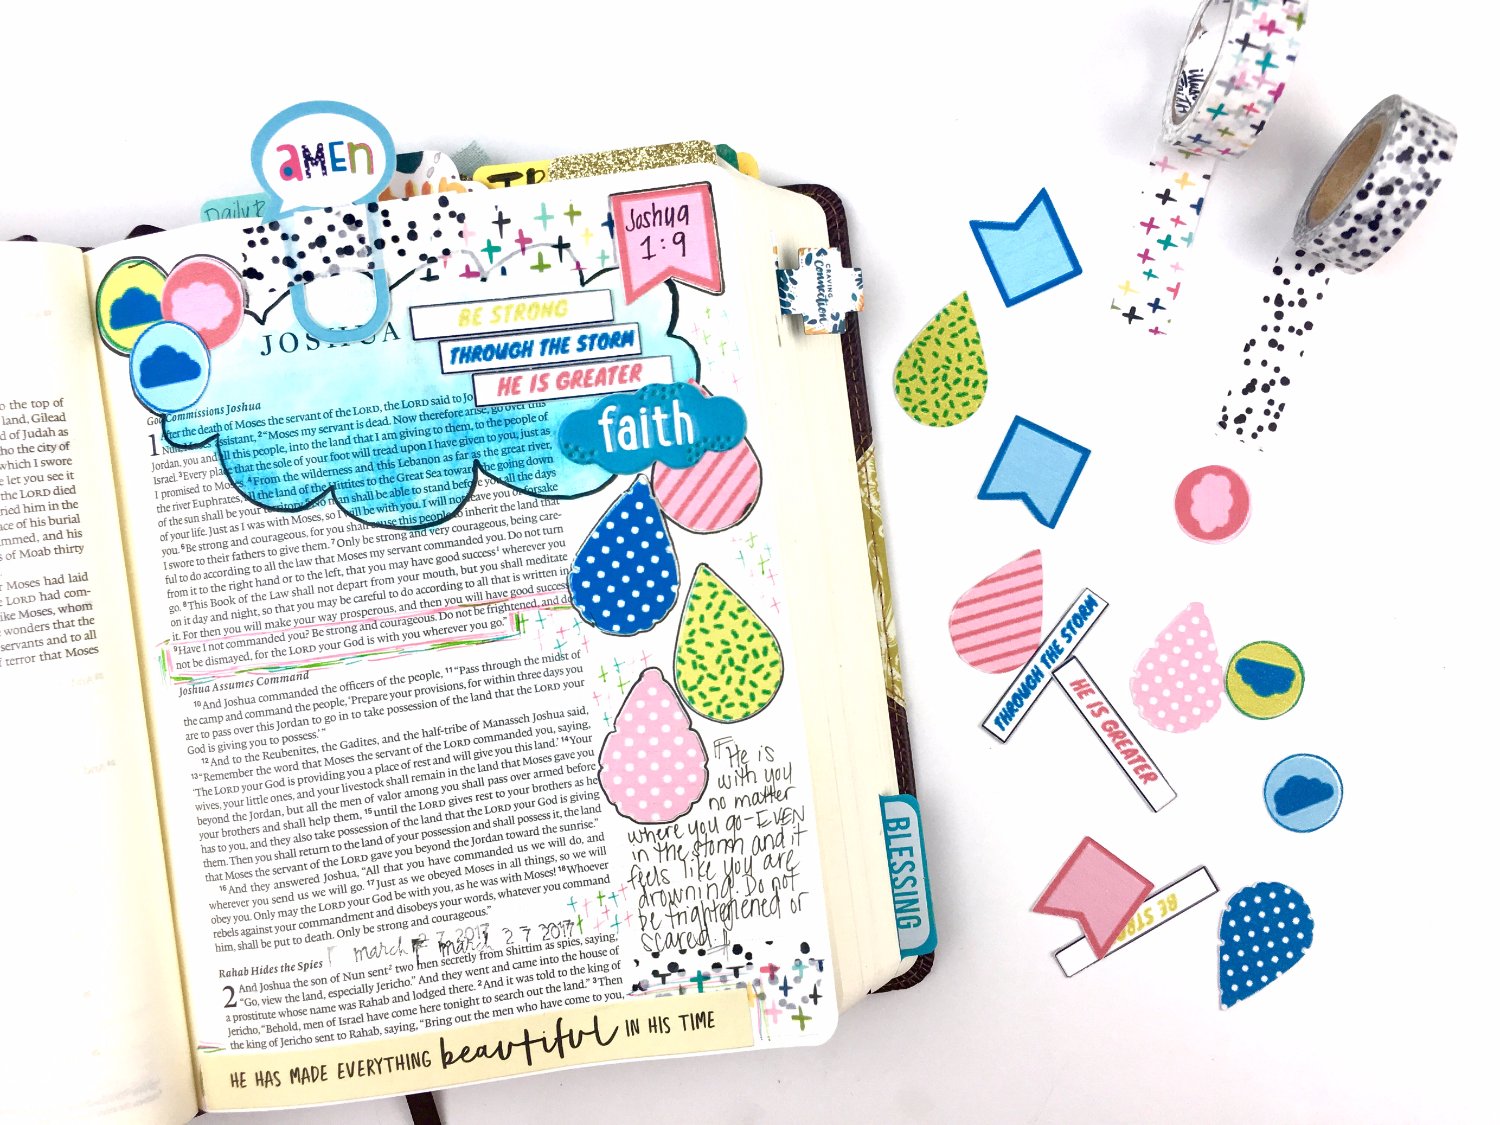
That’s where this FREE printable came from. I wanted to illustrate the storms of life in my journaling Bible so I made raindrops and clouds with different quotes for my Bible entry. These would also be fun to use for a weekly planner theme to decorate with. *Keep reading in order to get your downloadable file for your printable below.
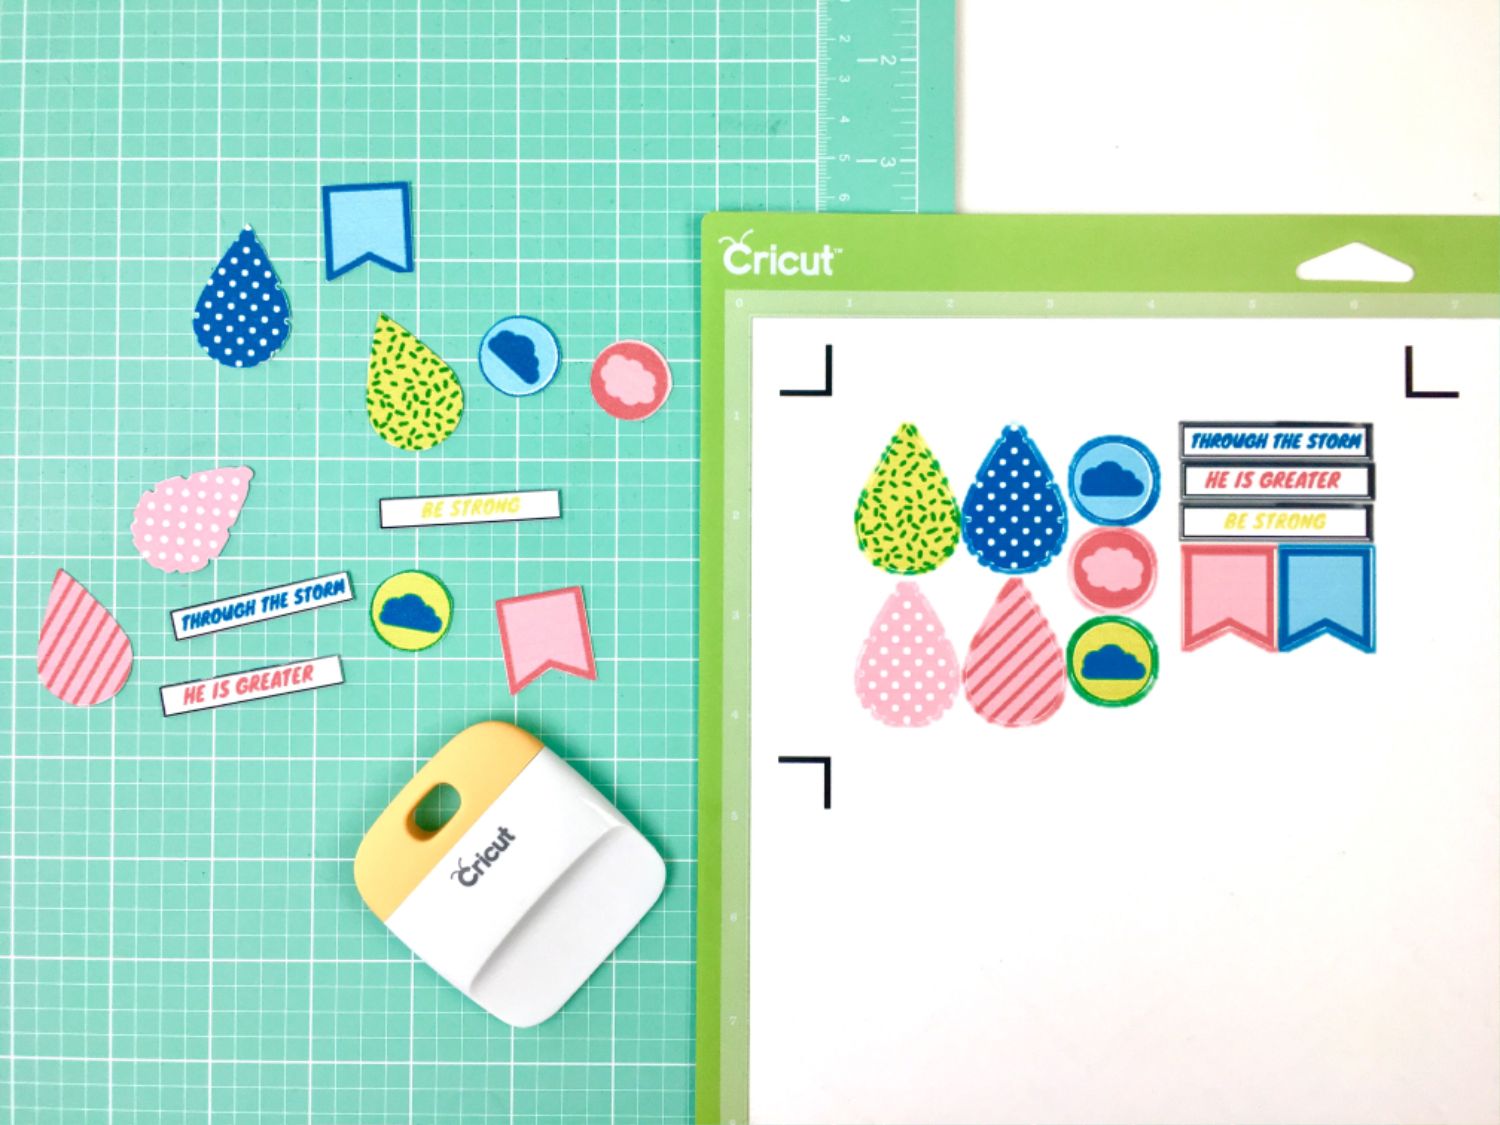
I just love the polka dots and sprinkles with the bright pops of color. The only thing is that it becomes tiresome and tedious when you have so many different little designs with intricate outlines to cut by hand. The Cricut will cut all of these out for me so I don’t have to spend the time doing it and getting frustrated because my lines aren’t perfectly straight. Then using a few Cricut tools, I can easily remove the paper cuts from the mat.
Click here to save the below image to your computer to upload to Cricut. (Keep reading if you would rather download as PDF.)
Step-by-Step Tutorial:
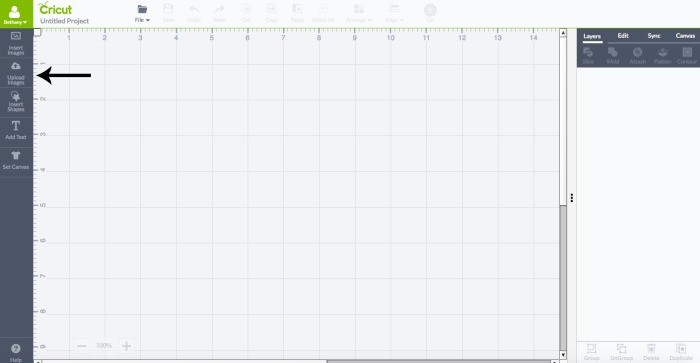
Begin a new project in Cricut Design Space. Click on the left tab labeled “Upload Images.”
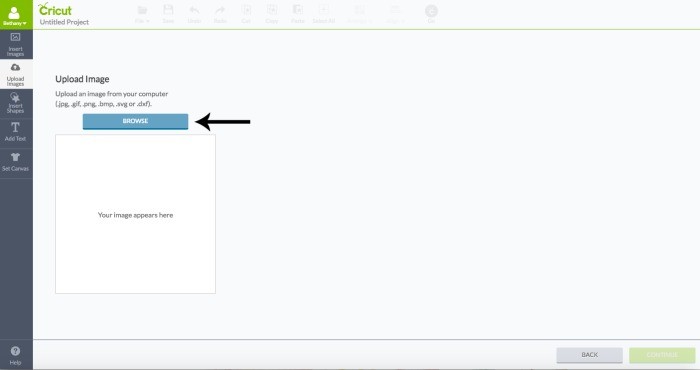
Click “Browse” and then search and find the PNG file of the printable that we saved above.
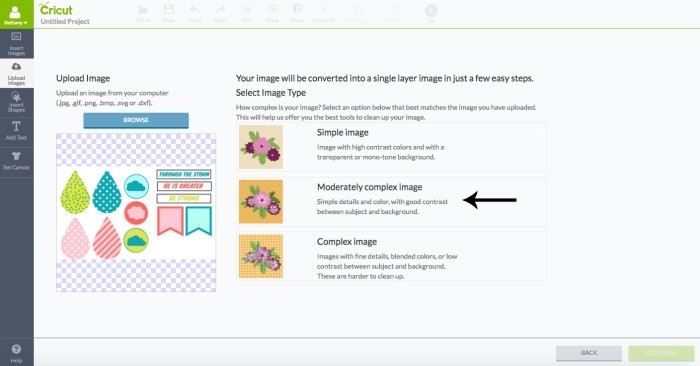
Choose the complexity of your image. For this printable, choose the “Moderately complex image.”
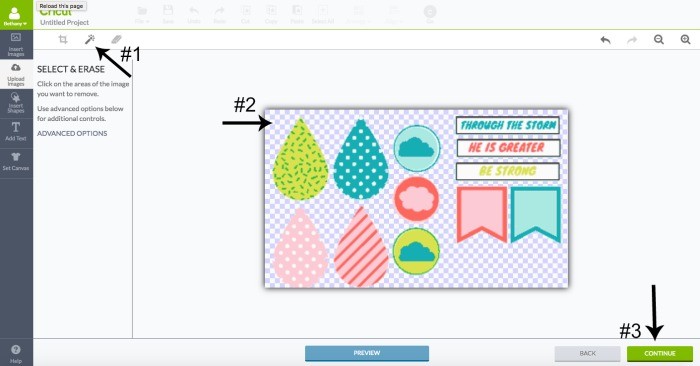
Now you are going to want to make a few simple changes to the image so that each part is cut individually instead of the entire rectangle being cut out as 1 single object.
- Click the tool as shown below beside #1.
- Then click the background or white space. This will make the background transparent so the Cricut will recognize each individual part to cut them separately.
- Then click “Continue.”
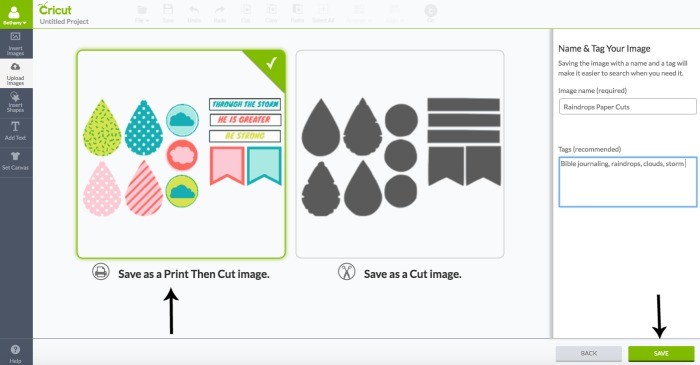
You will then choose whether to save the image as a “Print then Cut” or just as a “Cut image.” Choose “Print then Cut” for this project. You can also name the file and add tags so it is easier to find later once saved in Cricut Design Space. Then click “Save.”
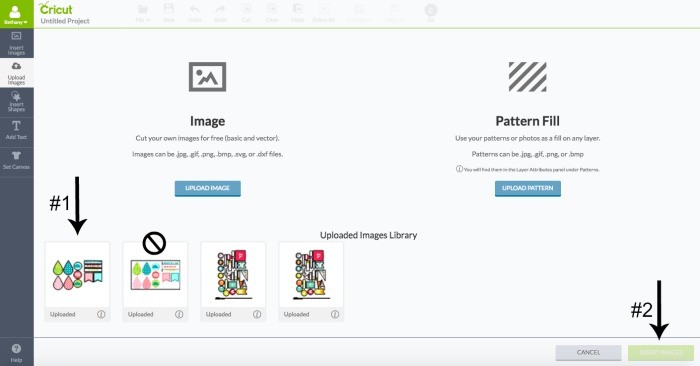
The file will now be saved under your “Uploaded Images Library” as shown below. Below you will see the #1 which is the file to choose for this project. You will notice that each individual part shows black lines outlining each one. This is where the Cricut machine will cut. The 2nd image below show the entire printable outlined with the black line meaning Cricut will only cut the entire image as one piece, and not individually.
- You will now select the file we just saved.
- Then click “Insert image.”
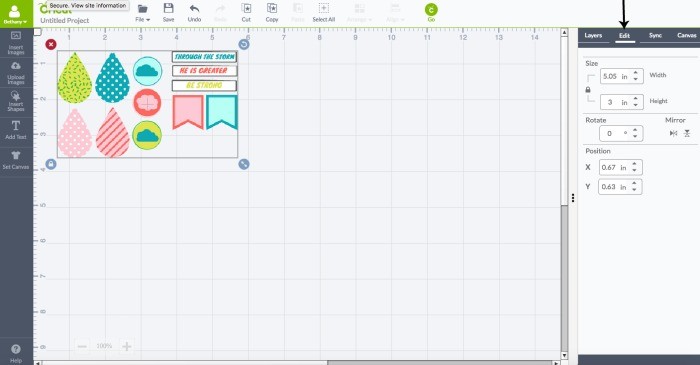
Click the “Edit” tab on the right side to set the size you want exactly. I made my height 3″ which automatically changes the width accordingly. You will want to save the project and then click “Go” to get started.
You are just about ready to Print then Cut.
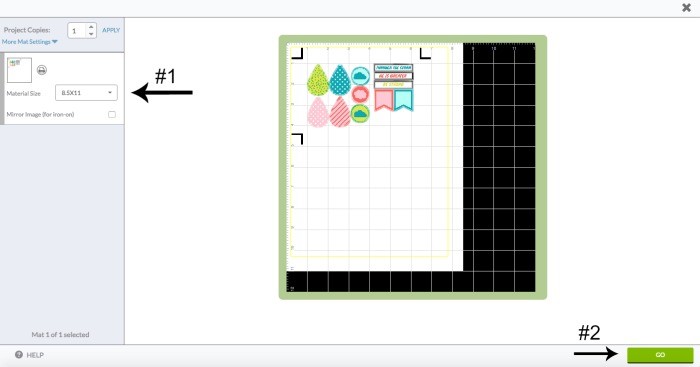
- Check your settings on the left side for your material size and number of copies.
- Then click “Go”.
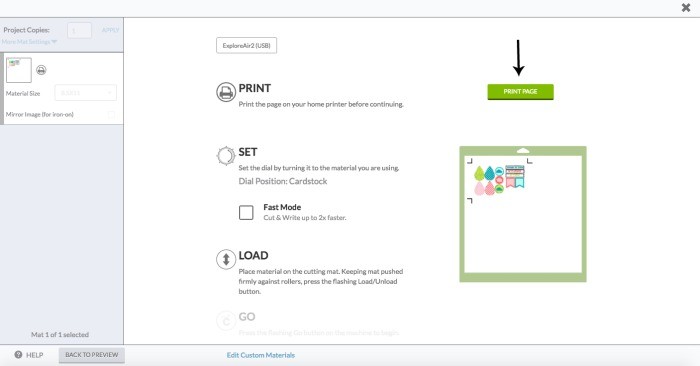
The below image shows the screen with the entire process from printing to cutting.
- Make sure your paper is loaded into your printer and then click “Print Page.” You will be prompted by your printer to select print.
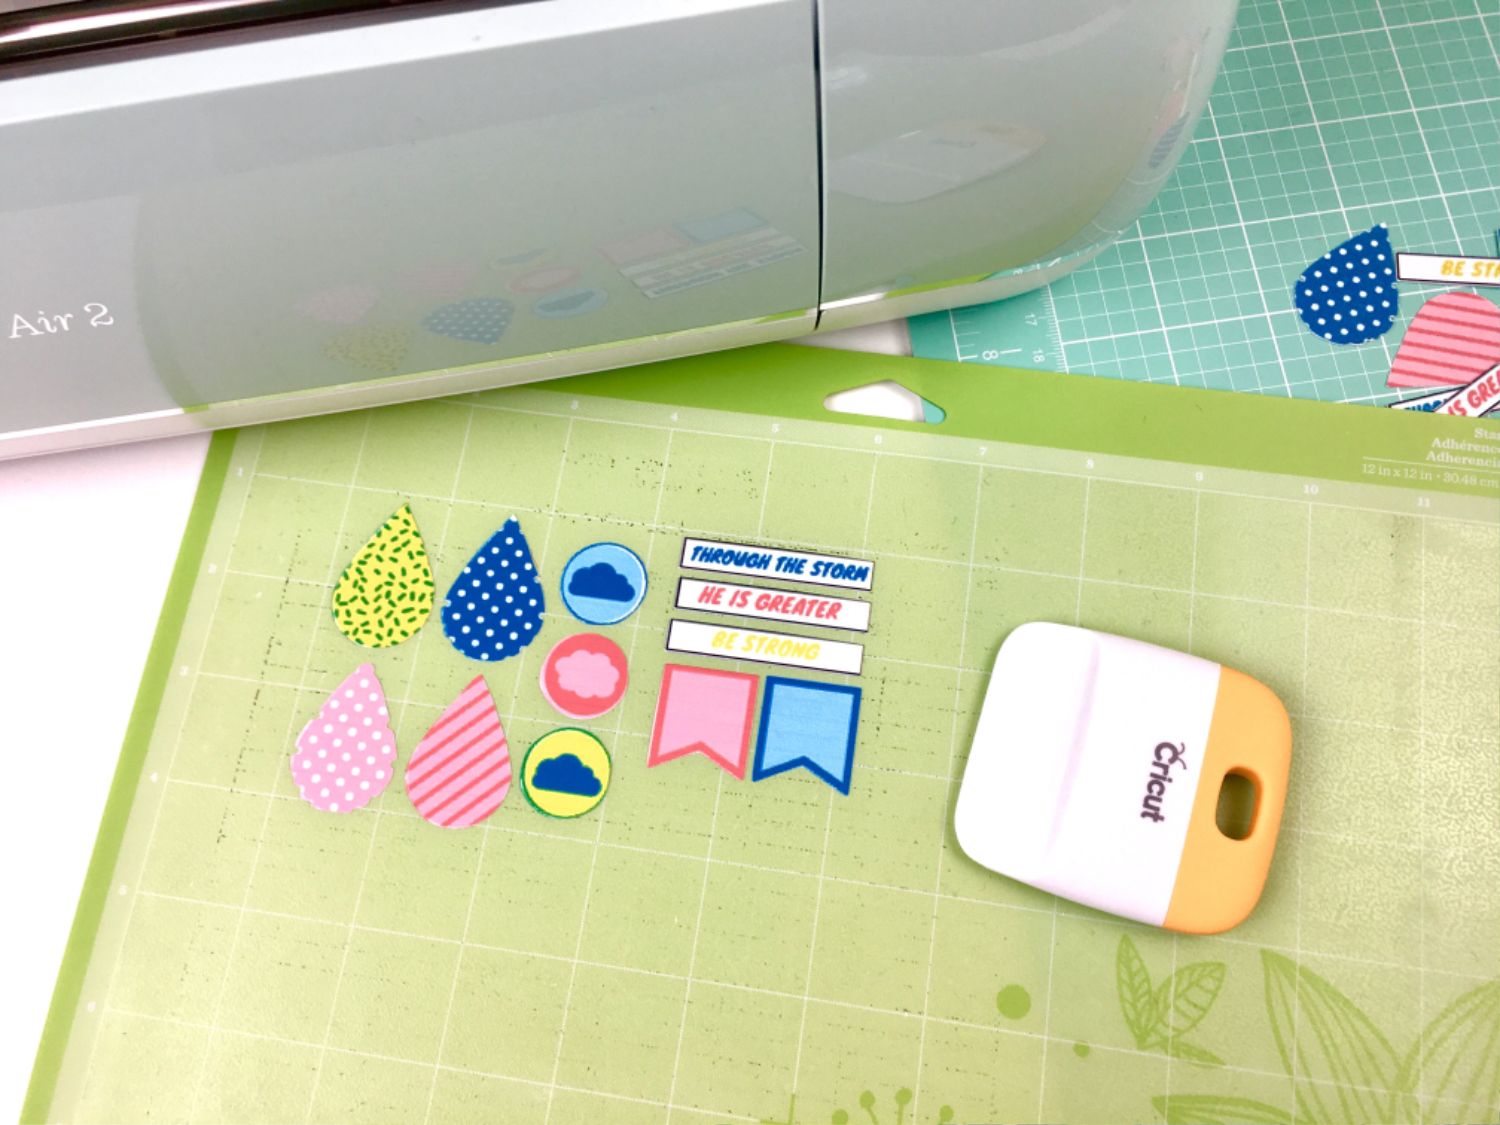
- Place your printed paper on the cutting mat and load into the machine. Make sure your dial is set to the appropriate material.
- Press the Cricut logo on the machine to start cutting.
- Press the double arrow button to unload once cutting is complete
- Remove the printables from the mat using the Cricut tools to make it easier.
You are now ready to use your paper cuts. Below is an example of how I used mine in my journaling Bible. I just love this whole raindrop theme which pairs perfectly with my April Bible Journaling Challenge prompts that went live yesterday. The theme for April is Comfort.
CLICK HERE TO GET SHOPPING AND START CUTTING OUT YOUR OWN PAPER CUTS USING THE CRICUT EXPLORE AIR 2.
If you want to print yours and then cut them out yourself, click HERE for the PDF file.
This is a sponsored conversation written by me on behalf of Cricut. The opinions and text are all mine.
Some of the links in the post above are “affiliate links.” This means if you click on the link and purchase the item, I will receive an affiliate commission. Regardless, I only recommend products or services I use personally and believe will add value to my readers.
