Shutter Wall Art Decor and Felt Flower Tutorial

Create your own Summer decor with this shutter wall art decor and felt flower tutorial full of pops of color and flowers for the perfect look.

I hope you are enjoying your Summer so far and spending lots of time in the sunshine. We sure have, and I sure do love it! Today’s feature will also give you a fun idea to make this summer. It would really be perfect for some front porch decor so keep reading below to see how to make your own.

But first check out what my fellow bloggers have been up to and don’t forget to check out my feature for this week as well.

Shutter Wall Art Decor and Felt Flower Tutorial

Welcoming The Unofficial Start to Summer by Homestead 128

Modern Industrial Basement Makeover by The DIY Mommy

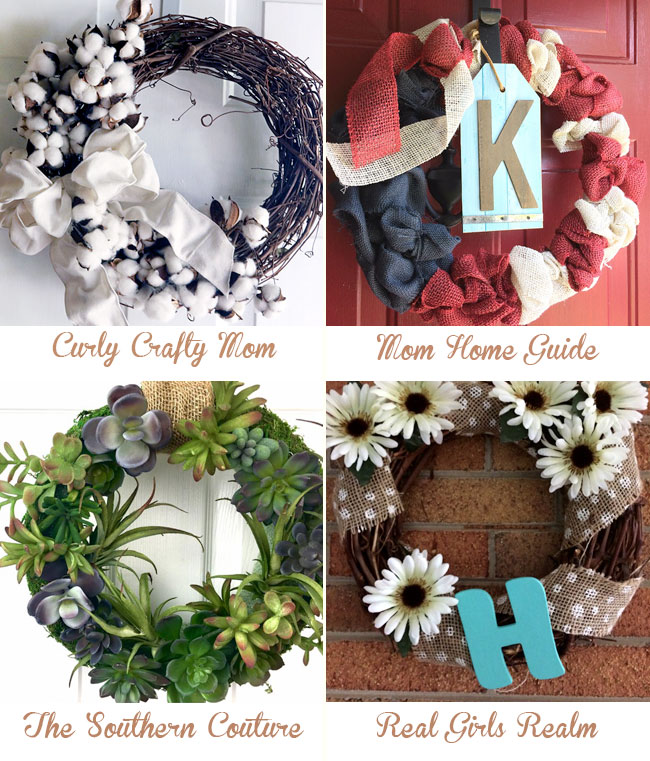
Summer Cotton Wreath by Curly Crafty Mom  

Building A Breezy Doghouse Tutorial by Southern Couture

Summer Patio Refresh by Mom Home Guide

Homemade Chai Frappacino by Joy In Our Home

Ready to share what has been motivating you this past week? Link up a recent post of yours that motivates you to create or just be awesome! Our goal is for this link up to focus on craft, DIY, & home posts so please try to remember that when linking up.

  • Limit three links per week and remember to link directly to your post, not your blog.
  • Do not link stores, giveaways, or other link parties.
  • Be sure to hop around some of the other posts that have been linked up to share the love and get motivated by what others have been up to.
  • By adding your links, you are stating that you have the proper licensing/rights to the images in your blog posts.

Each week, your hosts will choose a post to feature from the previous week. If you want a chance at being featured, you must follow all of the hosts in someway. By linking up, you agree to let each host share your photo and link back to your site, as well as receive a weekly e-mail letting you know when the party is live. We will never give your e-mail or info to anyone, nor will we spam you!

The Creative Corner link party goes live Sunday 6pm PST and ends Thursday at 5pm PST.

Subscribe to our mailing list


When I saw this idea from Flamingo Toes, I absolutely fell in love with the touch of pink and pastel flowers. Make sure to check out this shutter wall art decor and felt flower tutorial.

Shutter Wall Art Decor and Felt Flower Tutorial

Don’t forget to grab this button if you’ve been featured.

Now it’s your turn to join in on the fun and link up your recent craft, DIY, or home posts so get ready to motivate others and be inspired! Don’t forget, if you want a chance to be featured next week to follow all of the hosts above!

Now hop over to all the other cohost’s blogs and see what caught their eye this week. You just might be featured there too!


Building a Breezy Doghouse Tutorial

This shop has been compensated by Collective Bias, Inc. and its advertiser. All opinions are mine alone. I pinky promise! #RoofedItMyself #CollectiveBias

Your puppy will thank you once you have accomplished this adorable build. Get this building a breezy doghouse tutorial now that is easy to put together and complete. 

Summer is most definitely here with the warm sunshine and good times spent outside. That means my furbabies will be spending more time outside playing and enjoying the fresh air with me. The only problem is that my youngest puppy, Jayda, really didn’t have a place of her own outside to relax. But not anymore…

That’s where this adorable and cheerful doghouse has come to the rescue. I couldn’t wait to share this building a breezy doghouse tutorial with y’all too. Your puppies will thank you and me! But how do I know that this doghouse will stand the test of time with the weather and being outside? That’s all thanks to GAF roofing products and Lowe’s.

Building a Breezy Doghouse Tutorial

Before we actually build this beauty, you are going to need to know exactly where to gather all your supplies. On the end of the roofing aisle at your local Lowe’s is a GAF Roofing Center (similar to the one below) where you will see all the different types of shingles and what you will need to get started.

Building a Breezy Doghouse Tutorial

I chose the Timberline® shingles in Natural Shadow®, and they are beautiful! I can’t believe even myself is calling shingles beautiful but I really do love the color choices and how rich they look. Plus they are so durable which is even better. I also used the FeltBuster® High-Traction Synthetic Roofing Felt and the Grip Rite 1 ¼” galvanized steel roofing nails.

Building a Breezy Doghouse Tutorial

I know what you must be thinking that GAF is usually thought of as a professional product for contractors only. But that is just not true. Their products are perfect for DIY enthusiasts and even the most novice so let’s get to building for your cute puppy too.

For the base of the doghouse, you will need wooden pieces in the following measurements:

  • 4- 2″x2″x14.5″
  • 4- 2″x4″x16″
  • 4- 2″x4″x18″

Building a Breezy Doghouse Tutorial

Using wood screws attach the base of the doghouse as pictured below with the 18″ pieces for the bottom sides and the 16″ pieces in the middle.

Building a Breezy Doghouse Tutorial

Then add the remaining 2-18″ pieces at the top on each side just as the bottom.

Building a Breezy Doghouse Tutorial

To create the top of the doghouse, you will need:

  • 1- 2″x6″x22″
  • 4- 2″x4″x19.5″ cut at a 45 degree angle with the longest side of the wood still measuring 19.5″

Building a Breezy Doghouse Tutorial

Attach the angled pieces to the 22″ board as shown below. Then attach to the frame we built above using wood screws.

Building a Breezy Doghouse Tutorial

For the roof of the doghouse, you will need 6- 1″x6″x22″. Attach to the frame we previously built for the roof.

Now you are ready to attach the FeltBuster® to the roof using roofing nails. I just spread mine out and made sure it was smooth against the wood.

Building a Breezy Doghouse Tutorial

Add the Timberline® shingles on top. Be sure to line them up just right for the perfect color and style.

Building a Breezy Doghouse Tutorial

I painted the doghouse aqua and left some of the wood showing through for a more rustic look. I made a wooden sign and attached to the front of the doghouse using scrap wood, spray paint, vinyl, and my craft cutting machine.

Building a Breezy Doghouse Tutorial

I couldn’t be happier with the way this build turned out. Jayda seems to just love it and can relax while we are outside enjoying the warm sunshine.

Building a Breezy Doghouse Tutorial

Building a Breezy Doghouse Tutorial

Plus I love that I can depend on GAF and their roofing products to now provide shade and a sweet spot for my Jayda-Baby. I would love to know what project you have in mind to use GAF products as well. Please let me know in the comments below or share a picture with me on social media. If you are looking for ideas, then check out other project ideas HERE or follow them on Facebook.

Building a Breezy Doghouse Tutorial

Your puppy will thank you once you have accomplished this adorable build. Get this building a breezy doghouse tutorial now that is easy to put together.

Mason Jar Garden Flag Tutorial

Dress up your yard this Spring with this mason jar garden flag tutorial. Choose the color you like best and personalize it for your own family.

School is officially out here where I live, and I couldn’t be happier. There is just something about Summer and all the fun and sunshine it brings to really get you excited. I hope your summer plans are in place and ready to go. Maybe think about adding my feature for this week into your calendar for a little crafting and DIY fun.

But first check out what my fellow bloggers have been up to and don’t forget to check out my feature for this week as well.

Mason Jar Garden Flag Tutorial `Mason Jar Garden Flag Tutorial

Summer Front Porch 2017: Summer Gardening Series from Curly Crafty Mom.

Farmhouse Mudroom Makeover Reveal from Homestead 128.

Easy DIY Rustic Log & Reclaimed Wood Garden Bench from The DIY Mommy.

15+ Beautiful Farmhouse Style Makeovers from Joy In Our Home.

How To Make The Easiest Faux Succulent And Moss Wreath from The Southern Couture.

White Washed Patio Pots from Mom Home Guide.

Ready to share what has been motivating you this past week? Link up a recent post of yours that motivates you to create or just be awesome! Our goal is for this link up to focus on craft, DIY, & home posts so please try to remember that when linking up.

  • Limit three links per week and remember to link directly to your post, not your blog.
  • Do not link stores, giveaways, or other link parties.
  • Be sure to hop around some of the other posts that have been linked up to share the love and get motivated by what others have been up to.

Each week, your hosts will choose a post to feature from the previous week. If you want a chance at being featured, you must follow all of the hosts in someway. By linking up, you agree to let each host share your photo and link back to your site, as well as receive a weekly e-mail letting you know when the party is live. We will never give your e-mail or info to anyone, nor will we spam you!

The Creative Corner link party goes live Sunday 6pm PST and ends Thursday at 5pm PST.

Subscribe to our mailing list


I love mason jars, and I love garden flags so when I saw this mason jar garden flag tutorial from The Country Chic Cottage, I fell absolutely in love. The aqua color she used as well is so gorgeous!!

Mason Jar Garden Flag Tutorial

Don’t forget to grab this button if you’ve been featured.

Now it’s your turn to join in on the fun and link up your recent craft, DIY, or home posts so get ready to motivate others and be inspired! Don’t forget, if you want a chance to be featured next week to follow all of the hosts above!

Now hop over to all the other cohost’s blogs and see what caught their eye this week. You just might be featured there too!


How to Make the Easiest Faux Succulent and Moss Wreath

Learn how to make the easiest faux succulent and moss wreath with one tool that makes everything come together in less than 30 minutes. 

This post is sponsored by FloraCraft. All opinions are mine alone. I pinky promise! Some of the links below are “affiliate links.” This means if you click a link and purchase an item, I will receive a small affiliate commission that helps me to be able to continue with this blog and hopefully continue to inspire you as well.

One thing that I am absolutely dreamy about are succulents. Who isn’t these days? The great news is that if you think you have a black thumb, then this craft will still be perfect for you. How about FAUX succulents that are still just as stunning?!

How to Make the Easiest Faux Succulent and Moss Wreath

With a touch of moss and a variety of different succulents, you can have the most gorgeous wreath to hang anywhere you like too! I’m celebrating the 12 Months of Wreaths series today with this beauty, but keep reading for several other fun wreath ideas from several friends of mine.

How to Make the Easiest Faux Succulent and Moss Wreath

Supplies:

How to Make the Easiest Faux Succulent and Moss Wreath

These succulents along with the other items I’m using for this faux succulent and moss wreath are from FloraCraft. I have enjoyed using their products on a couple of past projects and couldn’t wait to create something fun with their succulents. They come in so many different colors and varieties. You will just love them!

First, wrap the moss around the outside of the wreath  using hot glue as needed. Place the overlap, if any, on the top side where the succulents will be placed and attach to the wreath using floral pins. These floral pins are what makes this project so easy. You can attach just about anything in no time. I love them!

How to Make the Easiest Faux Succulent and Moss Wreath

Next, start laying out your succulents and placing them as desired. I poked them straight into the styrofoam wreath. You don’t have to worry about covering the inside of the wreath with moss because your succulents should hide any of the foam.

How to Make the Easiest Faux Succulent and Moss Wreath

Then, measure and wrap a piece of burlap ribbon around the top of the wreath and tie in a knot. You can now hang your wreath and enjoy all that gorgeous nature.

How to Make the Easiest Faux Succulent and Moss Wreath

I really can’t get enough of this one and can’t believe I didn’t make one already. I have no clue what I was waiting for!

How to Make the Easiest Faux Succulent and Moss Wreath

But now let’s see what wreaths my friends have made for y’all so you can get even more ideas…


12MoWreathsMarch
Curly Crafty Mom – Summer Cotton Wreath
Mom Home Guide – Patriotic Red, White and Blue Bubble Wreath
The Southern Couture – Easiest Faux Succulent Moss Wreath

Real Girls Realm – Easy Summer Grapevine Wreath
Follow your Hosts and Co-Hosts:
Carrie Curly Crafty Mom Blog | Facebook | Pinterest | Instagram | Twitter | Bloglovin’
Lauren at Mom Home Guide Blog | Facebook | Pinterest | Instagram | Twitter | Bloglovin’

Bethany at The Southern Couture Blog | Facebook | Pinterest | Instagram | Twitter | Google+ | Bloglovin’
Mary at Real Girls Realm Blog | Facebook | Pinterest | Instagram | Twitter | Bloglovin’

Thanks again for joining us! We will be sharing a new wreath once a month in 2017 so be sure to come back again next month for more creative ideas!

Are you interested in sharing a wreath with us one (or more) months? We are accepting guest hosts! Email carrie (at) curlycraftymom (dot) com if you are interested!

Sounds like you have plenty of wreath ideas for your next craft night. I would love to know which one you choose to make. Please feel free to share or even share one of your own wreath ideas in the comments below. Enjoy! And the greatest of these is love,

Learn how to make the easiest faux succulent and moss wreath with one tool that makes everything come together in less than 30 minutes.

Embroidery DIY Project Perfect for Beginners

Try a new craft and learn something fun with this embroidery DIY project perfect for beginners.

School is almost out! I can’t wait. Maybe it already is for you. I have the perfect feature for you to check out this week that has a fun project that would be perfect to put on your bucket list. Enjoy!

But first check out what my fellow bloggers have been up to and don’t forget to check out my feature for this week as well.

Embroidery DIY Project Perfect for Beginners

Step Out Of Your Comfort Zone With Bible Journaling from The Southern Couture.

Easy DIY Sequin Beach Hat from Curly Crafty Mom.

How To Clean And Style A Cotton Canvas Hammock from The DIY Mommy.

Antique Milk Can Planter from Joy In Our Home.

Spring Bedroom Refresh from Mom Home Guide.

Eucalyptus Hoop Wreath DIY Tutorial from Homestead 128.

Ready to share what has been motivating you this past week? Link up a recent post of yours that motivates you to create or just be awesome! Our goal is for this link up to focus on craft, DIY, & home posts so please try to remember that when linking up.

  • Limit three links per week and remember to link directly to your post, not your blog.
  • Do not link stores, giveaways, or other link parties.
  • Be sure to hop around some of the other posts that have been linked up to share the love and get motivated by what others have been up to.

Each week, your hosts will choose a post to feature from the previous week. If you want a chance at being featured, you must follow all of the hosts in someway. By linking up, you agree to let each host share your photo and link back to your site, as well as receive a weekly e-mail letting you know when the party is live. We will never give your e-mail or info to anyone, nor will we spam you!

The Creative Corner link party goes live Sunday 6pm PST and ends Thursday at 5pm PST.

Subscribe to our mailing list


I have been wanting to try embroidery for a while now. I am really going to have to put that on my bucket list for summer now that I have found this embroidery DIY project perfect for beginners from Flamingo Toes.

Embroidery DIY Project Perfect for Beginners

Don’t forget to grab this button if you’ve been featured.

Now it’s your turn to join in on the fun and link up your recent craft, DIY, or home posts so get ready to motivate others and be inspired! Don’t forget, if you want a chance to be featured next week to follow all of the hosts above!

Now hop over to all the other cohost’s blogs and see what caught their eye this week. You just might be featured there too!


DIY Bath Bomb Tutorial Perfect for Handmade Gift

Check out this DIY bath bomb tutorial perfect for handmade gift for any special person who loves to enjoy some pampering.

Well Happy Mother’s Day! I hope y’all have enjoyed your day and still are. My feature for this week is perfect for all the mothers and women to really pamper themselves. You will definitely want to keep this one for future reference.

But first check out what my fellow bloggers have been up to and don’t forget to check out my feature for this week as well.

DIY Bath Bomb Tutorial Perfect for Handmade Gift

A Farmhouse Office Reveal from Joy In Our Home.

Boho Farmhouse Dining Room Reveal from The DIY Mommy.

Fabric & Moss Covered Pots Plus A Giveaway from Curly Crafty Mom.

What Tools & Accessories Do I Need To Use A Cricut? from The Southern Couture.

How To Clean White Kitchen Cabinets from Mom Home Guide.

Adding Color To The Farmhouse Front Porch from Homestead 128.

Ready to share what has been motivating you this past week? Link up a recent post of yours that motivates you to create or just be awesome! Our goal is for this link up to focus on craft, DIY, & home posts so please try to remember that when linking up.

  • Limit three links per week and remember to link directly to your post, not your blog.
  • Do not link stores, giveaways, or other link parties.
  • Be sure to hop around some of the other posts that have been linked up to share the love and get motivated by what others have been up to.

Each week, your hosts will choose a post to feature from the previous week. If you want a chance at being featured, you must follow all of the hosts in someway. By linking up, you agree to let each host share your photo and link back to your site, as well as receive a weekly e-mail letting you know when the party is live. We will never give your e-mail or info to anyone, nor will we spam you!

The Creative Corner link party goes live Sunday 6pm PST and ends Thursday at 5pm PST.

Subscribe to our mailing list


Gluesticks Blog shared with us last week this delightful DIY bath bomb tutorial perfect for handmade gift idea. It seems so simple and beautiful for anyone who enjoys some good pampering.

DIY Bath Bomb Tutorial Perfect for Handmade Gift

Don’t forget to grab this button if you’ve been featured.

Now it’s your turn to join in on the fun and link up your recent craft, DIY, or home posts so get ready to motivate others and be inspired! Don’t forget, if you want a chance to be featured next week to follow all of the hosts above!

Now hop over to all the other cohost’s blogs and see what caught their eye this week. You just might be featured there too!


End of School Year Teacher Gift Ideas Plus FREE Printable Gift Tag

Check out these end of school year teacher gift ideas plus FREE printable gift tag just in time before summer break.

This post is sponsored by Dayspring. All opinions are mine alone. I pinky promise! Some of the links below are “affiliate links.” This means if you click a link and purchase an item, I will receive a small affiliate commission that helps me to be able to continue with this blog and hopefully continue to inspire you as well.

School’s out forever, School’s out for summer…As I’m writing this blog post, I couldn’t help but start singing these lyrics. Now you probably have them in your head too. Sorry about that, but at least Summer break is almost here.

That means it’s time to start thinking about your child’s teacher and what little token of appreciation that you can give them. I thought it would help you to mark one more thing off your list with a few gift ideas here and even a FREE printable gift tag to top it all off.

End of School Year Teacher Gift Ideas Plus FREE Printable Gift Tag

One thing I am obsessed with lately (and I think a lot of women are) is florals!! They have been popular in fashion and even decor. So when I found this set of coasters from Dayspring that has not only florals but also encouraging scripture, I knew they were the perfect solution.

End of School Year Teacher Gift Ideas Plus FREE Printable Gift Tag

All you need to do is tie them up with a little bakers twine for an extra touch and add the printable gift tag. (Keep reading to get your gift tag file.)

End of School Year Teacher Gift Ideas Plus FREE Printable Gift Tag

This coaster set will go along great with this next idea. How about a giant mug filled with all their favorite pampering accessories. We all know the school year can become tiring and draining, especially for the teachers. So it would be nice for them to have something to pamper themselves with.

End of School Year Teacher Gift Ideas Plus FREE Printable Gift Tag

Grab this giant mug with the chalkboard (which fits perfectly for teachers) and then more gorgeous florals. It’s the perfect size to really add lots of little goodies. Then they can reuse it later for a giant cup of coffee once school starts back or to hold colored pencils in their classroom.

End of School Year Teacher Gift Ideas Plus FREE Printable Gift Tag

End of School Year Teacher Gift Ideas Plus FREE Printable Gift Tag

I’ve included a sweet treat, bag of tea with tea “holder” (I think that’s what you call it.), lotion, and body spray. Some bath bombs would also be a great idea! Or  maybe add in a gift card to the spa. Fill in the extra space with some paper grass and you have the cutest gift.

End of School Year Teacher Gift Ideas Plus FREE Printable Gift Tag

Now make sure to grab your FREE printable gift tag HERE! Talk about one stop shop!

And then head over to grab your teacher goodies from Dayspring!!

You will also want to check out their Graduates section as many will be moving on to a new endeavor in their life and could really use the positive encouragement. Use the coupon code CONGRATS to get 25% off this section!


There will also be a special section with gifts marked down to $5, $10, and $15 through 5/20/17! (The coupon code cannot be applied here.)

Happy Shopping!

Check out these end of school year teacher gift ideas plus FREE printable gift tag just in time before summer break. Get all you need in one place.

What Tools and Accessories do I Need to use a Cricut and How Much do They Cost?

You may be asking, “What tools and accessories do I need to use a Cricut and how much do they cost?”. Find all the answers you need to get started creating today.

Thank you to Cricut for sponsoring this post and making it possible for all of us to enjoy crafting so much more. All opinions are mine alone. I pinky promise!

Recently you may have seen some of the fun I was having using my Cricut Explore Air 2 on social media. When I’m having a blast, I just have to share. Check out my intro to Cricut post HERE if you are wanting more info about the actual machine itself.

Get to Know the Cricut Explore Air 2

That’s why I couldn’t wait to dive a little deeper and answer one of the most frequently asked questions about Cricut. “What tools and accessories do I need to use a Cricut and how much do they cost?” Plus you will want to stick around after that for a fun summer project using a new product of Cricut and their tools.

Once you have your Cricut cutting machine, you will need a cutting mat for sure to hold the material while the machine cuts it. The mats come in varying sizes and also grip strength. The mats have a different color for the different grips so that helps to keep them separate and not confuse them.

What Tools and Accessories do I Need to use a Cricut and How Much do They Cost?

You have your Cricut machine and cutting mat, but now you need a few tools that will make your crafting life a whole lot easier. Cricut has an Essential Tool Set with 7 tools that is perfect for those getting started. All the tools included help with all the different materials you will be cutting. Plus they have tool sets now that will match your machine just perfectly. I am in love with the mint! Hands down!

What Tools and Accessories do I Need to use a Cricut and How Much do They Cost?

The set includes a paper trimmer that can cut materials up to 12” wide along with a replacement blade for the trimmer. There is also a scoring blade that you can interchange when needing to add score lines to a project such as cardmaking, papercrafts, paper boxes, etc.

What Tools and Accessories do I Need to use a Cricut and How Much do They Cost?

Below is a picture of the other tools included and a list of them (from left to right) so you know exactly what each tool does and is used for. (Still crushing over this mint. Eek!)

What Tools and Accessories do I Need to use a Cricut and How Much do They Cost?

  • Scraper: to burnish material and clean all cutting mats
  • Scissors: to cut different materials, also includes a blade cover
  • Tweezers: to lift and secure delicate material
  • Weeder: to remove tiny negative cuts
  • Scoring stylus: to add fold lines to cards and envelopes
  • Spatula: to lift cuts from the mat

(Above info from Cricut.com)

Now do you technically have to have every single tool I mentioned above to complete a project using the Cricut? You do NEED the mat! The other tools are EXTREMELY helpful when completing projects, especially those that have very tedious and tiny cuts. Speaking of tiny cuts and using the tools, let’s jump into a project I finished recently that comes just in time for your gardening and fashion.

I decided to add a monogram to the sides of my gardening/rain boots for a little extra flair and shine.

What Tools and Accessories do I Need to use a Cricut and How Much do They Cost?

Who says gardening can’t be fun and fashionable at the same time? I used the NEW holographic vinyl and couldn’t wait to see it glisten especially in the sunshine.

What Tools and Accessories do I Need to use a Cricut and How Much do They Cost?

Supplies:

  • Holographic vinyl: pink, blue, or opal
  • Transfer tape
  • Cutting mat, standard grip
  • Scissors
  • Weeder tool

I designed my project in Cricut design space first. You can also check out the Make it Now projects for more ideas. Check out this similar one using a monogram. They will also help guide you through an entire project until you learn the software and feel more comfortable. Below is what my finished project looked like in Design Space.

What Tools and Accessories do I Need to use a Cricut and How Much do They Cost?

Using the scissors from the Essential Took Kit, I cut out some of the pink holographic vinyl and placed it on my cutting mat. 1st, these scissors are awesome and cut so easily and smoothly. 2nd, how gorgeous is that new vinyl? I love the shine and look it gives depending how you look at it and at what angle.

What Tools and Accessories do I Need to use a Cricut and How Much do They Cost?

Below is also a picture of the opal vinyl. In this shot, it looks like it is blue but still so gorgeous. Each one really has so many different shades of color too.

What Tools and Accessories do I Need to use a Cricut and How Much do They Cost?

Once the Cricut has finished cutting my material and I’ve removed the cutting mat, I peeled back the larger section of negative vinyl. This picture shows you the back of the holographic vinyl and that gorgeous pink color that shines through.

What Tools and Accessories do I Need to use a Cricut and How Much do They Cost?

Using the weeder, start removing the other negative vinyl. The sharp tip of the weeder is perfect for getting the vinyl pulled up and then you can just peel it back. The weeder also helps to remove even the tiniest, most intricate cuts that nothing else can usually.

What Tools and Accessories do I Need to use a Cricut and How Much do They Cost?

I cut a section of the transfer tape and pulled the backing off while I adhered the tape to the top of my vinyl cut.

What Tools and Accessories do I Need to use a Cricut and How Much do They Cost?

I removed the entire cut with the backing of the vinyl still intact and the transfer tape on top. This just makes it easier to work with to remove the backing from the vinyl.

What Tools and Accessories do I Need to use a Cricut and How Much do They Cost?

Using the transfer tape, adhere the vinyl cut to your rain boot and burnish the vinyl. You really just want to make sure the entire vinyl cut is adhered with no air bubbles or wrinkles. This is where the scraper comes in handy to rub the vinyl down evenly. The layer of transfer tape will then easily peel away from the vinyl  and rain boot.

What Tools and Accessories do I Need to use a Cricut and How Much do They Cost?

Do the same thing to the other boot and you are ready to work in your flower beds or maybe just sport some pretty snazzy boots on the next rainy day. In the pictures below, I am using the opal holographic vinyl.

What Tools and Accessories do I Need to use a Cricut and How Much do They Cost?

What Tools and Accessories do I Need to use a Cricut and How Much do They Cost?

What projects would you want to make with the holographic vinyl? Let me know in the comments below.

Plus don’t forget to check out these new tool sets that come in matching colors to the cutting machines. You will love them! Plus they help tremendously. With a few basic tools, you are ready to get started in no time creating your next masterpiece.

GRAB YOURS NOW!!!

You may be asking, “What tools and accessories do I need to use a Cricut and how much do they cost?”. Find all the answers you need to get started creating. Plus check out these monogram gardening boots using the holographic vinyl from Cricut. Your gardening will never be the same.

This is a sponsored conversation written by me on behalf of Cricut. The opinions and text are all mine.

Mini Succulent Planter Gift Idea Plus FREE Printable Gift Tag

Check out this mini succulent planter gift idea plus FREE printable gift tag just in time for Mother’s Day or end of school year teacher gifts.

Mother’s Day is just a week away! My feature today is going to be a lovely idea for you to snatch up now just in time for Mother’s Day. You will definitely want to check it out and make some this week.

But first check out what my fellow bloggers have been up to and don’t forget to check out my feature for this week as well.

Mini Succulent Planter Gift Idea Plus FREE Printable Gift Tag

Ready to share what has been motivating you this past week? Link up a recent post of yours that motivates you to create or just be awesome! Our goal is for this link up to focus on craft, DIY, & home posts so please try to remember that when linking up.

  • Limit three links per week and remember to link directly to your post, not your blog.
  • Do not link stores, giveaways, or other link parties.
  • Be sure to hop around some of the other posts that have been linked up to share the love and get motivated by what others have been up to.

Each week, your hosts will choose a post to feature from the previous week. If you want a chance at being featured, you must follow all of the hosts in someway. By linking up, you agree to let each host share your photo and link back to your site, as well as receive a weekly e-mail letting you know when the party is live. We will never give your e-mail or info to anyone, nor will we spam you!

The Creative Corner link party goes live Sunday 6pm PST and ends Thursday at 5pm PST.

Subscribe to our mailing list


I absolutely fell in love with this idea from The Turquoise Home! These mini succulent planters are just precious. She even has a free printable gift tag for you to use.

Mini Succulent Planter Gift Idea Plus FREE Printable Gift Tag

Don’t forget to grab this button if you’ve been featured.

Now it’s your turn to join in on the fun and link up your recent craft, DIY, or home posts so get ready to motivate others and be inspired! Don’t forget, if you want a chance to be featured next week to follow all of the hosts above!

Now hop over to all the other cohost’s blogs and see what caught their eye this week. You just might be featured there too!


End of Year Teacher Gift Idea with a Cherry Theme

Make some teacher’s day with this end of year teacher gift idea with a cherry theme that she is sure to love and enjoy. The gift tag is also adorable! 

My weekend has been absolutely full of adventure and fun. I hope yours has been too and now you are ready to party and get ready for another productive week and fun feature. Today’s feature will help you with getting ready for those end of year teacher gifts. Keep reading to check it out.

We also have a new co-host to announce which I am very excited about. Lauren from Mom Home Guide is now here sharing her goodness so be sure to welcome her on her social media and check out her blog.

But first check out what my fellow bloggers have been up to and don’t forget to check out my feature for this week as well.

End of Year Teacher Gift Idea with a Cherry Theme

The DIY Mommy
Blog | Facebook | Pinterest | Twitter | Google+ | Instagram | Bloglovin’

Curly Crafty Mom
Blog | Facebook | Pinterest | Instagram | Twitter | Bloglovin’

Homestead 128

Blog  |  Facebook  |  Pinterest  |  Instagram  |  Twitter  |  Bloglovin’

The Southern Couture
Blog | Facebook | Pinterest | Instagram | Twitter | Google+ | Bloglovin’

 Joy In Our Home
Blog | Facebook | Pinterest | Instagram | Twitter | Google + Bloglovin

Mom Home Guide
Blog | Facebook | Pinterest | Instagram | Twitter | Google+ | Bloglovin’

Ready to share what has been motivating you this past week? Link up a recent post of yours that motivates you to create or just be awesome! Our goal is for this link up to focus on craft, DIY, & home posts so please try to remember that when linking up.

  • Limit three links per week and remember to link directly to your post, not your blog.
  • Do not link stores, giveaways, or other link parties.
  • Be sure to hop around some of the other posts that have been linked up to share the love and get motivated by what others have been up to.

Each week, your hosts will choose a post to feature from the previous week. If you want a chance at being featured, you must follow all of the hosts in someway. By linking up, you agree to let each host share your photo and link back to your site, as well as receive a weekly e-mail letting you know when the party is live. We will never give your e-mail or info to anyone, nor will we spam you!

The Creative Corner link party goes live Sunday 6pm PST and ends Thursday at 5pm PST.

Subscribe to our mailing list


Lolly Jane has the most perfect idea for your end of school year teacher gift ideas. This end of year teacher gift idea with cherry theme is so adorable.

End of Year Teacher Gift Idea with a Cherry Theme

Don’t forget to grab this button if you’ve been featured.

Now it’s your turn to join in on the fun and link up your recent craft, DIY, or home posts so get ready to motivate others and be inspired! Don’t forget, if you want a chance to be featured next week to follow all of the hosts above!

Now hop over to all the other cohost’s blogs and see what caught their eye this week. You just might be featured there too!