10 Things I Love about My Cricut Maker

Today I’m sharing my favorite projects using the Cricut Maker plus BIG sale on Cricut Maker bundles are now available while supplies last. Use the coupon code to save on Christmas gifts for yourself or a fellow crafter. 

Thank you to Cricut for sponsoring this post. All opinions are mine alone. I pinky promise! Some of the links below are “affiliate links.” This means if you click a link and purchase an item, I will receive a small affiliate commission that helps me to be able to continue with this blog and hopefully continue to inspire you as well.

If you love a good craft or DIY project, then a Cricut Maker is a MUST for you. If you don’t have one, how have you even survived? Okay, let’s not get too dramatic. But in all seriousness, I’m just in love with the Cricut Maker and everything it can do. From cutting leather and fabric plus more to engraving and debossing, I’m truly blown away every time I create with it. (Learn more about the Cricut Maker HERE.)

10 Things I Love about My Cricut Maker

Today is the day to grab your Cricut Maker if you haven’t already. Maybe a fellow crafter has one on their wish list for Santa. Well I have good news. Cricut is having a HUGE sale right now on these Maker bundles that comes with the Maker and a machine tote. How cool is that?! There are also several different color options from rose to lilac to blue. Use the coupon code VIPMAKER for an additional $75 discount off these already discounted bundles saving you $125!! Even Santa likes to save a good buck or two when he can. 

CLICK HERE TO GRAB YOUR CRICUT MAKER BUNDLE!!

My Favorite Projects using the Cricut Maker Plus Big Sale

I can’t wait to share my favorite projects today I’ve made with y’all to hopefully give you some inspiration to start creating. If you have felt overwhelmed and not sure where to begin, then hopefully today’s post will give you some encouragement to get started.


Let’s start off with this LETTER TO SANTA using felt, fabric, and iron-on vinyl. I still can’t believe the Maker cut out all these materials. 

How to Make Keepsake Letters to Santa with Felt Envelope Using the Cricut Maker

I also made this LEATHER TRAVELERS NOTEBOOK and MEMORY FLIP BOOK using the Cricut Maker to cut out the leather. Leather?! Yes, completely serious!

10 Things I Love about My Cricut Maker

Make a Leather Memory Flip Book Using Cricut Maker

And don’t forget this MINI NOTEBOOK I made most recently with the cutest leather embellishment on the front. The Maker not only cut out the leather but also engraved it with the cutest rainbow. I also debossed the cover to say “create” using their QuickSwap Tools. 

DIY Mini Notebook Tutorial using Cricut Maker

Can you even believe all this and so much more can truly be done using the Cricut Maker? I feel like I have only begun to dip my toes into the full potential of the Maker. I can’t wait to keep creating and learning so much more. Will you join me or make someone else’s Christmas a dream come true with the Cricut Maker? Grab these awesome bundles now and don’t forget to use the coupon code VIPMAKER for that extra $75 savings! Happy Crafting!

Today I'm sharing my favorite projects using the Cricut Maker plus BIG sale on Cricut Maker bundles are now available while supplies last. Use the coupon code to save on Christmas gifts for yourself or a fellow crafter. 

This is a sponsored conversation written by me on behalf of Cricut. The opinions and text are all mine.


Top 5 Reasons for Crafting with Cricut Explore Air 2 Plus DIY Travelers Notebook

Check out my top 5 reasons for crafting with Cricut Explore Air 2 plus DIY travelers notebook tutorial using patterned cardstock. The Cricut Explore Air 2 makes my creativity come to life. 

Thank you to Cricut for sponsoring this post. All opinions are mine alone. I pinky promise! Some of the links below are “affiliate links.” This means if you click a link and purchase an item, I will receive a small affiliate commission that helps me to be able to continue with this blog and hopefully continue to inspire you as well.

I have been crafting since I was a small girl, and I don’t see that changing any time soon. Thanks to my Cricut Explore Air 2, I can make pretty much anything my heart desires including my own customized travelers notebooks which I am sharing today for documenting memories, taking notes, and so much more.

Top 5 Reasons for Crafting with Cricut Explore Air 2 Plus DIY Travelers Notebook 

The Explore Air 2 cuts 2x faster than the previous Explore models so we all have time to craft even more. I can create new projects on the go using my iPad and then bring them to life with the Explore Air 2’s bluetooth technology. And for those of you that still have your Cricut cartridges, they are compatible with this cutting machine too. How nice is that?!

Top 5 Reasons for Crafting with Cricut Explore Air 2 Plus DIY Travelers Notebook

I can’t wait to share with y’all my TOP 5 REASONS for CRAFTING with the CRICUT EXPLORE AIR 2 and the tutorial for creating this Gratitude Travelers Notebook. 

Top 5 Reasons for Crafting with Cricut Explore Air 2 Plus DIY Travelers Notebook

#1: I can create my own CUSTOMIZED projects.

So many times when I’m out shopping I have seen shirts, notebooks, home decor, and so much more that I adore but would love to change it up just a bit. Now I can do just that with the Cricut Explore Air 2. Using Cricut’s Design Space Software, the options and ideas are truly endless like this Grateful Travelers Notebook just in time for a month of Thanksgiving. 

Top 5 Reasons for Crafting with Cricut Explore Air 2 Plus DIY Travelers Notebook

Click HERE for the project and cut files in Design Space to make your own right along with me. Then check out the video below to see how I put it all together. 


Top 5 Reasons for Crafting with Cricut Explore Air 2 Plus DIY Travelers Notebook

After the different patterned papers are cut out, I stapled them together and layered the accents and title on the cover. The title can easily be changed in Design Space and customized for whatever you want to use the TN for. 

Top 5 Reasons for Crafting with Cricut Explore Air 2 Plus DIY Travelers Notebook

#2: The Explore Air 2 can cut 100 different materials. 

When I mentioned customized projects above, I truly meant it even down to the type of material you use. My personal favorites are cardstock, iron-on vinyl, and everyday vinyl. There is a fine-point and deep-point blade that helps to cut out of all the different materials too. 

Top 5 Reasons for Crafting with Cricut Explore Air 2 Plus DIY Travelers Notebook

#3: I don’t have to guess what cut settings to use for different materials. 

Now that I can cut out 100 different materials, there is no way I can remember all the different cut settings. The Explore Air 2 has a smart dial with different material options so all I have to do is select the material. I can move it between the settings depending if I want a lighter or deeper cut too. 

Top 5 Reasons for Crafting with Cricut Explore Air 2 Plus DIY Travelers Notebook

#4: I can do more than just cutting with a scoring stylus and pens for custom lettering. 

Now I’m not just cutting out all the things, but also stepping up my crafting game to another level. The scoring stylus makes the perfect score lines for making your own gift boxes, cards, and more. The Explore Air 2 can even write using its double tool holder. There are lots of fonts to choose from in Design Space too. 

Top 5 Reasons for Crafting with Cricut Explore Air 2 Plus DIY Travelers Notebook

#5: I save so much money by making my own creations. 

Not only do I love to DIY and craft whenever I have the chance, but I adore saving money. I can make greeting cards, home decor, personalized t-shirts, gift tags, notebooks, and so much more. Plus I can design them just the way I want instead of settling for something in the store that I’m really not happy with. The Explore Air 2 is perfect for any of my fellow frugal crafters. Trust me. You will be obsessed. 

Top 5 Reasons for Crafting with Cricut Explore Air 2 Plus DIY Travelers Notebook

I cannot wait to get to my next project, but for now this Grateful Travelers Notebook is the perfect place to document my gratitude during November. I would love to use it for listing things I’m thankful for or even documenting fun Fall days with my family using pictures and journaling. 

Top 5 Reasons for Crafting with Cricut Explore Air 2 Plus DIY Travelers Notebook

Make sure to check out the Cricut Explore Air 2 and grab one before Christmas to create all the DIY Christmas gifts too!

Check out my top 5 reasons for crafting with Cricut Explore Air 2 plus DIY travelers notebook tutorial using patterned cardstock. The Cricut Explore Air 2 makes my creativity come to life. 

This is a sponsored conversation written by me on behalf of Cricut. The opinions and text are all mine.


Cricut Iron-On Tutorial using EasyPress Mini for Unique Craft Projects

Check out this Cricut iron-on tutorial using EasyPress Mini for unique craft projects including this lunch bag I embellished for my little boy. 

Thank you to Cricut for sponsoring this post. All opinions are mine alone. I pinky promise! Some of the links below are “affiliate links.” This means if you click a link and purchase an item, I will receive a small affiliate commission that helps me to be able to continue with this blog and hopefully continue to inspire you as well.

Now I can add iron-on vinyl to just about everything. Yes, you heard that right. I may just turn into a crazy iron-on lady. But in all seriousness, the crafting possibilities are now endless. Cricut has done it again. They released their Maker machine and now the EasyPress Mini

Cricut Iron-On Tutorial using EasyPress Mini for Unique Craft Projects

I can start putting iron-on to hats, shoes, and everything. Oh my! But first I’m starting with my little guy’s lunch bag. Since the bag doesn’t lay flat and has zippers and a handle, I never had the opportunity to really personalize it. Well now I can. I decided to add this fun quote, “Get in my belly,” for a little fun humor. I’m obsessed!! And what’s even better is now you can make your own too. 

Cricut Iron-On Tutorial using EasyPress Mini for Unique Craft Projects

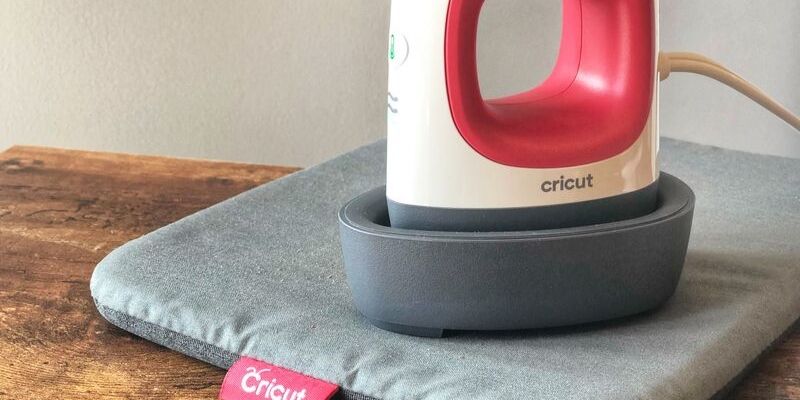
Before we get started on this fun project, get your hands on one of these EasyPress Minis. You will thank me later. The mini size is so stinkin’ adorable. And yes, I said stinkin’. It heats up quickly and is so simple to use. There is also a base to rest it on to protect your table from the heat. Grab yours HERE

Cricut Iron-On Tutorial using EasyPress Mini for Unique Craft Projects

Now let’s get started crafting. You can make yours with the design I have in Cricut Design Space HERE. The work is already done for you. You may just want to resize it for your own lunch box. 

Cricut Iron-On Tutorial using EasyPress Mini for Unique Craft Projects

Plug in the EasyPress Mini and let it start heating. Use Cricut’s Heat Guide to know what setting you need and how long to apply pressure depending on the material you are ironing on. It makes any project a breeze. 

What’s even better is that this project can be made with either the Maker or Explore Air 2. First cut out the iron-on vinyl and be sure to mirror the cut in Design Space. 

Cricut Iron-On Tutorial using EasyPress Mini for Unique Craft Projects

Once the iron-on vinyl is cut and you have weeded it, you can heat the lunch bag where the vinyl will be applied. I recommend using the EasyPress mat under your project to protect your work surface. Then place your iron-on on the lunch bag. 

Cricut Iron-On Tutorial using EasyPress Mini for Unique Craft Projects

I also use Cricut’s heat mat over my project to protect the plastic and iron-on from overheating. You could also use a washcloth if you are concerned about it. Then apply pressure for the time specified by the heat guide mentioned earlier. 

Cricut Iron-On Tutorial using EasyPress Mini for Unique Craft Projects

I removed the plastic film from the iron-on and voila! I’m obsessed. I just love how quick and easy this project was thanks to the EasyPress Mini. Now I can personalize even stuffed animals, hats, shoes, handbags, and anything else I can get my hands on. 

Cricut Iron-On Tutorial using EasyPress Mini for Unique Craft Projects

What is the next thing you want to make with iron-on vinyl? Let me know what you think about the EasyPress mini and grab yours HERE

Check out this Cricut iron-on tutorial using EasyPress Mini for unique craft projects including this lunch bag I embellished for my little boy. 

This is a sponsored conversation written by me on behalf of Cricut. The opinions and text are all mine.


Planner Tips and Tricks with Planner Accessories Organization

Today I’m sharing some new planner tips and tricks with planner accessories organization as I update from my last post how I’m keeping daily life organized. 

Thank you to DaySpring for sponsoring this post. All opinions are mine alone. I pinky promise! Some of the links below are “affiliate links.” This means if you click a link and purchase an item, I will receive a small affiliate commission that helps me to be able to continue with this blog and hopefully continue to inspire you as well.

One of my most favorite things is paper planner. There is something about having a paper and pen in my hand to plan my month out that keeps me productive. I recently shared about my newest planner, the Studio 71 Premium Devotional Planner. You can see the whole review and flip-through HERE if you missed it before. 

Planner Tips and Tricks with Planner Accessories Organization

I mentioned before that I wanted to try something different with this planner and keep it simple. I used to use all the supplies to decorate my weekly page layouts from washi to scrapbook paper to stickers and more. But I never could keep it up like I wanted.

Planner Tips and Tricks with Planner Accessories Organization

Today I’m sharing what has worked, what I’ve changed, and even some new tips that I think will help you stay more organized too. Check out the video below. 


I love these new goodies from the Studio 71 line at DaySpring that match my planner beautifully. The stainless steel tumbler is perfect for coffee, tea, or water to sit on my desk while I’m working. 

Planner Tips and Tricks with Planner Accessories Organization

But I think my favorite is definitely this new canvas pouch. I love the scripture, matching florals, pom embellishment, and yarn tassel.

Planner Tips and Tricks with Planner Accessories Organization

Planner Tips and Tricks with Planner Accessories Organization

I love that it stands on its own making it easy to find supplies when I’m working. Plus check out that peach color lining. I’m totally head over heels. 

Planner Tips and Tricks with Planner Accessories Organization

Now let me know in the comments below what your best planner organization tips are. I would love to know how y’all stay organized. And don’t forget to check out the planner accessories and even more that was just released over at DaySpring. God bless!

Planner Tips and Tricks with Planner Accessories Organization

Today I'm sharing some new planner tips and tricks with planner accessories organization as I update from my last post how I'm keeping daily life organized. 

DIY Mini Notebook Tutorial using Cricut Maker

Check out this DIY mini notebook tutorial using Cricut Maker and their new QuickSwap Toolset that makes it a breeze to create your own personalized projects. 

Thank you to Cricut for sponsoring this post. All opinions are mine alone. I pinky promise! Some of the links below are “affiliate links.” This means if you click a link and purchase an item, I will receive a small affiliate commission that helps me to be able to continue with this blog and hopefully continue to inspire you as well.

I don’t know about you, but I can never have too many journals and travelers notebooks lying around. I’m obsessed with them and always have been. I also love creating my own so I can personalize it anyway I choose. Thanks to my Cricut Maker, it makes creating them even quicker and more gorgeous. 

DIY Mini Notebook Tutorial using Cricut Maker

First of all, make sure to check out more details about the Cricut Maker HERE if you are new to the Cricut machines. When Cricut released the Maker a couple years ago, they promised more tools would also come along as part of their adaptive tool system. More tools means more projects and ideas that can come to life. 

10 Things I Love about My Cricut Maker

These new tools now allow you to deboss, engrave, and more with materials like metal and leather. All you have to do is swap the tool from the housing unit and keep on creating with ease. Learn more about their newest tools HERE

DIY Mini Notebook Tutorial using Cricut Maker

Now let’s get started so you can create your own mini notebook too. The best news about this whole project is that I have already created the design and all you have to do is create it using your Maker. Click HERE for the project in Cricut Design Space. 

DIY Mini Notebook Tutorial using Cricut Maker

DIY Mini Notebook Tutorial using Cricut Maker

Cricut Design Space will walk you through creating the mini notebook by loading your cutting mat with the scrapbook paper into the Maker and also changing out the tools as needed. I even engraved the leather hexie on the cover using the Maker. 

DIY Mini Notebook Tutorial using Cricut Maker

After everything was cut out, I assembled the white cardstock inside the scrapbook paper and just stapled the binding. For the cover, I used the Rob and Bob Lattice paper pack

DIY Mini Notebook Tutorial using Cricut Maker

I then added the leather embellishment to the cover using a glue stick. I love that the Maker can now engrave lots of different materials too. 

DIY Mini Notebook Tutorial using Cricut Maker

Now for the extra fun part. I thought it would be fun to create some fun printable rainbow stickers that coordinate with the rainbow engraved leather embellishment and also the scrapbook paper shown above. 

GRAB YOUR FREE PRINTABLE HERE!

DIY Mini Notebook Tutorial using Cricut Maker

Check out the video below to see the Maker QuickSwap Toolset up close and in detail. I also show the free printable in more detail. Hope you enjoy!


I printed my rainbows on the Avery 8665 clear sticker paper and then cut them out to decorate the inside pages of my mini notebook. I just love the extra touch of color and fun they give this little guy. 

Let me know in the comments below what you plan on making next with the Cricut Maker or maybe you are going to grab your machine now. I can’t wait to see what you create. 

This is a sponsored conversation written by me on behalf of Cricut. The opinions and text are all mine.


Check out this DIY mini notebook tutorial using Cricut Maker and their new QuickSwap Toolset that makes it a breeze to create your own personalized projects. 

Ideas for Organizing Art and Craft Supplies

Check out these ideas for organizing art and craft supplies to make your next projects less overwhelming and lots more fun. 

Thank you to DaySpring for sponsoring this post. All opinions are mine alone. I pinky promise. Some of the links below are “affiliate links.” This means if you click a link and purchase an item, I will receive a small affiliate commission that helps me to be able to continue with this blog and hopefully continue to inspire you as well.

When there is mess and chaos, what should be a fun project suddenly seems overwhelming and exhausting. Keeping myself organized makes it so much more fun and enjoyable. This is really true for all of life but especially when it comes to Bible journaling for me. Check out these ideas and tools to help you stay more organized with your art and craft supplies. 

Ideas for Organizing Art and Craft Supplies

Ideas for Organizing Art and Craft Supplies

The video below shows you several new goodies that I recently discovered that have been keeping my supplies and craft room more organized. I’m sharing lots of different ideas for using them whether you love Bible journaling, are a teacher, small group leader, etc. 


I’m absolutely obsessed first with the black and white color scheme with handlettered verses and encouraging words. These will match anyone’s craft room, classroom, etc. 

Ideas for Organizing Art and Craft Supplies

This carry all case is exactly that! It can carry all your basic essentials for any Bible journaling entry or craft project. From washi tape to paints to watercolors to pens and so much more, you can have all your supplies in one place. How perfect is that for traveling?!

Ideas for Organizing Art and Craft Supplies

Because I love to Bible journal and have to have flexibility with a little one running around, I love that this case has a strap for easy carrying and 5 containers that slide out easily. 

Ideas for Organizing Art and Craft Supplies

The expanding case has me all nostalgic thinking of my grandmother when I was younger and how she would keep all her coupons in one place. Now I can do the same when it comes to stickers, ephemera, stamps, and more. 

Ideas for Organizing Art and Craft Supplies

There are lots of folders inside so you can literally organize everything in its own compartment. Now you won’t lose anything. Each folder has a tab at the top so you can label them and find what you need quickly. 

Ideas for Organizing Art and Craft Supplies

Several ideas I thought of for using this include for leftover pieces from past devotional kits or holding stamp sets. You could also designate this case for one particular project like a devotional kit. Then all the different pieces of that kit could be organized in one place making it easy to bring it along no matter where you find yourself journaling. 

Ideas for Organizing Art and Craft Supplies

I would love to hear your ideas for ways to use these organizers and any other craft supply organization tips you may have. Let me know in the comments below. And don’t forget to grab your goodies from DaySpring!

Check out these ideas for organizing art and craft supplies to make your next projects less overwhelming and lots more fun. 

Father's Day Gift Ideas Round-up

Check out this Father’s Day gift ideas round-up for several gifts perfect for any Dad or special man in your life. There is also something for anyone’s interest or hobbies. 

Thank you to DaySpring for sponsoring this post. All opinions are mine alone. I pinky promise. Some of the links below are “affiliate links.” This means if you click a link and purchase an item, I will receive a small affiliate commission that helps me to be able to continue with this blog and hopefully continue to inspire you as well.

June is the month for celebrating the amazing Dads and men in our lives. We are called to respect our husbands, fathers, and men. Today I’m dedicating this post to the amazing men in my life and specifically my husband Mark. And we can’t let Father’s Day pass without showing them how much we love and appreciate them. 

Father's Day Gift Ideas Round-up

I shared a Mother’s Day round-up of gift ideas in May and just couldn’t leave the men out. Check out the video below to see several fun gift ideas from DaySpring depending on their hobby or interest. Plus you get FREE shipping on Father’s Day gifts which is even better. Just use the coupon code DADSHIP.


In addition to the FREE shipping from DaySpring, today is the very LAST day to get your gifts delivered in time for Father’s Day so head over and grab something special now. 

Father's Day Gift Ideas Round-up

What do you think your Dad or husband would love to open Sunday? I would also love to hear what you admire most about your Dad or what the greatest lesson he has taught you. Let me know in the comments below. 

Check out this Father's Day gift ideas round-up for several gifts perfect for any Dad or special man in your life. There is also something for anyone's interest or hobbies. 

Simple Organization and Planner Ideas using a Devotional Planner

Try some simple organization and planner ideas using a devotional planner to keep daily life manageable and stress to a minimum. 

Some of the links below are “affiliate links.” This means if you click a link and purchase an item, I will receive a small affiliate commission that helps me to be able to continue with this blog and hopefully continue to inspire you as well.

If there are any ways to keep life as stressLESS as possible, I want to know all of them. Staying organized for me and planning ahead is an absolute must as much as possible if I want to keep my sanity. When I find ways that help, I want to share them with y’all too so you can have the happiest days possible. Life is just too short to not be. In walks my DaySpring Premium Devotional Planner

Using a Devotional Planner to Keep Life Organized

This planner officially releases today too so you can get yours now! How fun is that?! Just in time for July. I recently shared all the details of this beauty with y’all in a flip-through video in case you missed it. I also mentioned before that I would love to show y’all how I’m setting mine up and planning to use mine to stay organized. 

Using a Devotional Planner to Keep Life Organized

For this planner, I took a total turn from how I normally use a planner and couldn’t be more excited. Simple is just better for some seasons of life. See all the details and my page set-ups in the video below. 


I mentioned in the video how I am doing things totally different this year. In the past I have used color coding, washi tape, stickers, etc. But I ended up finding that if I didn’t have all those things and the pages weren’t beautiful, then I felt like I couldn’t allow myself to write things in. This time I’m using a black pen (love the Illustrated Faith 0.25 pen) and a pencil. Nothing fancy!

Simple Organization and Planner Ideas using a Devotional Planner

For me I write in things that I know are more set in stone in ink like birthdays, appointments, etc. and tentative events or blog posts in pencil. I don’t want to use wite-out or mark through things. I may even end up using pencil all the time. Who knows? 

Simple Organization and Planner Ideas using a Devotional Planner

With my weekly view, I am writing in my blog posts with its to-do lists on the right side so I can write in daily to-dos on the left side. I love how the weekly spread also has these boxes for marking things off when they’re done. 

Using a Devotional Planner to Keep Life Organized

Each month has its own devotional which I adore. I went through the one for July and did some markings that I typically do when studying the Word or a Bible study. Then I wrote in some notes of reflection at the bottom that I could read on and focus throughout that month. 

Simple Organization and Planner Ideas using a Devotional Planner

I wanted to mention and share as well the back of the pages so you can see how they handle the ink. Below is a page after using the Illustrated Faith pen which has minimal shadowing and absolutely no bleed through. 

Simple Organization and Planner Ideas using a Devotional Planner

I also had someone in the flip-through video previously to request that I try the Paper Mate Flair pens. I used a black one in the back to write out a prayer of hope. I was pleasantly surprised to see that there was only shadowing too and no bleed through. 

Simple Organization and Planner Ideas using a Devotional Planner

Let me know below too what your favorite ways to use a planner or stay organized are. This Mommy can always use any help she can get. 

GRAB YOUR PLANNER HERE!!

Try some simple organization and planner ideas using a devotional planner to keep daily life manageable and stress to a minimum. 

Using a Devotional Planner to Keep Life Organized

Let’s talk all about using a devotional planner to keep life organized while also nurturing our spiritual journey at the same time. 

Thank you to DaySpring for sponsoring this post. All opinions are mine alone. I pinky promise. Some of the links below are “affiliate links.” This means if you click a link and purchase an item, I will receive a small affiliate commission that helps me to be able to continue with this blog and hopefully continue to inspire you as well.

Life can be crazy, hectic, fun, and so much more on any given day. When you are trying to juggle everything around you, it most definitely starts to feel overwhelming. When I feel overwhelmed, then I’m anxious and things just are running smooth in my house like I would like for them to. If we can make things simpler and easier for us and our families, then why not? My go-to solution for staying organized is with a PLANNER

Using a Devotional Planner to Keep Life Organized

I am so a paper and pencil kind of gal, so I love having a planner to keep everything written down and organized in one place. And in walks this brand new PREMIUM DEVOTIONAL PLANNER from DaySpring as part of their Studio 71 collection. So wait a minute… You’re telling me I can keep all the daily to-do’s of life written down and also have a place to keep prayers, gratitude lists, and even a monthly devotional in one place? Yep, that’s right! 

Using a Devotional Planner to Keep Life Organized

After seeing all these features in this premium planner, I wondered why I had not thought of this idea before. Genius! I have been so anxious in excitement to show y’all all the fun details that make it different. Check out the video below as I flip-through this beauty and show you all the little extras too. 


The planner is now available for pre-order! When you pre-order, you will also receive a FREE surprise goodie bag with washi, stickers, clips, and more. And what’s even better is you will also get FREE SHIPPING. (They will start shipping 6/3.) Check out more features below.

Using a Devotional Planner to Keep Life Organized

Features:

  • Standard Size 8”x19”
  • 2mm Hard Front & Back Cover
  • Large Spiral Bound
  • Monthly Tabs
  • Elastic Band
  • Monthly Devotional
  • Monthly reflection

Using a Devotional Planner to Keep Life Organized

Each month has its own beautiful art on one side and then a devotional on the opposite side with scripture, devotion, reflection, and notes section. 

Using a Devotional Planner to Keep Life Organized

Below are more pictures of the inside of the devotional planner showing the monthly and weekly view, all the unique sections at the back, and also a pocket file. 

Using a Devotional Planner to Keep Life Organized

Using a Devotional Planner to Keep Life Organized

Using a Devotional Planner to Keep Life Organized

Using a Devotional Planner to Keep Life Organized

Using a Devotional Planner to Keep Life Organized

I think my favorite part is the devotional content and the extra sections at the back that really make this planner more of a life organizer for both my home and my spiritual well-being. Are you a paper planner type of girl? I would love to hear in the comments below. 

PRE-ORDER NOW FOR FREE SURPRISE GOODIE BAG + FREE SHIPPING!!

Using a Devotional Planner to Keep Life Organized

Let's talk all about using a devotional planner to keep life organized while also nurturing our spiritual journey at the same time. 

Make a Leather Memory Flip Book Using Cricut Maker

Check out this simple step-by-step tutorial to make a leather memory flip book using Cricut Maker. This book is the perfect idea for a baby’s first birthday or even for annual school pictures as a graduation gift. 

Thank you to Cricut for sponsoring this post. All opinions are mine alone. I pinky promise. Some of the links below are “affiliate links.” This means if you click a link and purchase an item, I will receive a small affiliate commission that helps me to be able to continue with this blog and hopefully continue to inspire you as well.

To keep special moments and memories alive, I love to document them. For me it seems like they are more real. I loved being able to create this leather memory flip book for my baby boy’s first birthday using my Cricut Maker. I wanted a way to capture his first year of life and also have a keepsake for his monthly photos from that first year too. 

Make a Leather Memory Flip Book Using Cricut Maker

Because the Cricut Maker is truly so amazing, I was able to make this leather flip-book in no time using a few supplies and my Cricut EasyPress 2. I talked about these new EasyPress Totes not long ago, and I’m truly in love with them. I can take my crafting on-the-go anytime with ease. Check out more details about the totes HERE

Meet the Cricut EasyPress Tote and Its Features

This crafting versatility with these new totes is essential for me as a new mom. Depending what’s going on in our house in a day, I have to make pretty much any room a craft room. Now I just carry my EasyPress 2 up and down the stairs to any area I want easily. 

Make a Leather Memory Flip Book Using Cricut Maker

To make your leather memory flip book, just CLICK HERE for the project in Cricut Design Space. All you have to do is cut your supplies out. You can also customize too if you want to change your cover title, etc. 

For my supplies, I used the genuine leather sheets, Boy’s World deluxe paper, and everyday iron-on from Cricut. You could also use their kraft sheets that are thicker for the inside pages of the book. 

Make a Leather Memory Flip Book Using Cricut Maker

Everyday iron on is one of my favorite materials to use. *Just make sure to mirror the image before cutting it out. Also place the shiny side down on the mat. 

Make a Leather Memory Flip Book Using Cricut Maker

Here are also a few tips for cutting out the leather. Make sure to place the leather upside down on the mat and attach to your strong grip (purple) cutting mat with heavy duty tape on the sides to keep it in place. The white rollers in the Maker should also be pushed all the way to the right side. Also feel free to have the Maker make several passes through the leather to be sure you have a very nice cut. 

Make a Leather Memory Flip Book Using Cricut Maker

This deluxe paper pack for a boy themed book is just adorable. I love every design and detail so much. Cricut truly has the most durable and high quality paper.

You may not even realize it, but you can actually iron onto leather. How cool is that?! I used my EasyPress 2 and mat to add my title to the cover. Also use Cricut’s EasyPress Quick Reference Guide for an easy way to know the settings for the EasyPress 2.

Make a Leather Memory Flip Book Using Cricut Maker

Now you can start assembling your flip book by placing the pages inside the leather cover. I held them all together using ribbon. 

Make a Leather Memory Flip Book Using Cricut Maker

You are ready to embellish your pages with all those fun photos and memories. You can make them as detailed or as simple as you like. 

Make a Leather Memory Flip Book Using Cricut Maker

I’m absolutely in love with how this turned out and can’t wait to flip through it for years to come and try not to soak the pages in all these Mom tears from my baby growing up way too fast. 

Make a Leather Memory Flip Book Using Cricut Maker

This little book would even be great to have out at a first birthday party or on a table in your living room for guests to flip-through as well. Let me know in the comments what your favorite material to iron-on is. I love trying new things and stepping out of my comfort zone. 

This is a sponsored conversation written by me on behalf of Cricut. The opinions and text are all mine.


Check out this simple step-by-step tutorial to make a leather memory flip book using Cricut Maker. This book is the perfect idea for a baby's first birthday or even for annual school pictures as a graduation gift.