Documenting Daily Memories Using a Planner

Now is the perfect time to start documenting daily memories using a planner. DaySpring has the most beautiful line of planners with so many options too. 

Thank you to DaySpring for sponsoring this post. All opinions are mine alone. I pinky promise! Some of the links below are “affiliate links.” This means if you click a link and purchase an item, I will receive a small affiliate commission that helps me to be able to continue with this blog and hopefully continue to inspire you as well.

Planners, and especially paper planners, are one of my most favorite things. I love to not only keep my days scheduled and organized but also have a place to write down daily memories. It can be anything from the most ordinary happenings of my day to something very exciting and memorable that took place. 

Documenting Daily Memories Using a Planner

Documenting Daily Memories Using a Planner

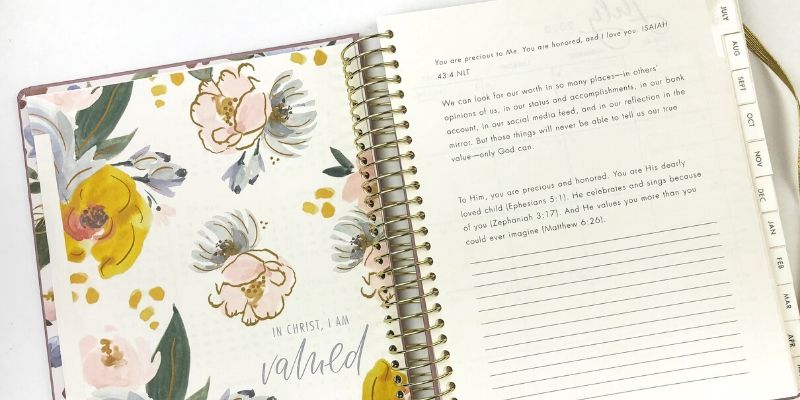
I started using DaySpring’s Studio 71 line of devotional planners last year, and I’m obsessed with them. I can’t wait to use this new one too. Each month has its own devotional which is so unique for a planner. 

Documenting Daily Memories Using a Planner

Check out the video below as I flip-through the planner sharing all its features as well as some ideas for using yours for memory keeping. 


Along with a monthly view, the weekly view is my favorite part. Each day has two columns. I plan to use one side for keeping home and blog organized. Then on the opposite side, I want to write down a few memories of what happened that day whether big or small. I may even write down my favorite memories of the day of things my little guy did or said. 

Documenting Daily Memories Using a Planner

Documenting Daily Memories Using a Planner

If your calendar isn’t full right now and you find your schedule is empty, this is a great way to still use your planner and keep those memories close to heart. 

Documenting Daily Memories Using a Planner

I sure hope you will grab your planner and join me during this time and document all the good you find each day. You may even want to keep a gratitude list written each day. Check out the Studio 71 planners from DaySpring as well as their other designs too. 

Documenting Daily Memories Using a Planner

Documenting Daily Memories Using a Planner

Before I let you go, I wanted to let you know that DaySpring is having a Bible journaling sale through 6/8 with many items up to 50% off and FREE shipping with $50+ purchase. The Workbook Guide to Bible Journaling by Shanna Noel is also marked down to only $10 which is a crazy good deal! I hope you enjoy some fun shopping! God bless!

Workbook Guide to Bible Journaling for All Skill Levels

Now is the perfect time to start documenting daily memories using a planner. DaySpring has the most beautiful line of planners with so many options too. 

Planner Tips and Tricks with Planner Accessories Organization

Today I’m sharing some new planner tips and tricks with planner accessories organization as I update from my last post how I’m keeping daily life organized. 

Thank you to DaySpring for sponsoring this post. All opinions are mine alone. I pinky promise! Some of the links below are “affiliate links.” This means if you click a link and purchase an item, I will receive a small affiliate commission that helps me to be able to continue with this blog and hopefully continue to inspire you as well.

One of my most favorite things is paper planner. There is something about having a paper and pen in my hand to plan my month out that keeps me productive. I recently shared about my newest planner, the Studio 71 Premium Devotional Planner. You can see the whole review and flip-through HERE if you missed it before. 

Planner Tips and Tricks with Planner Accessories Organization

I mentioned before that I wanted to try something different with this planner and keep it simple. I used to use all the supplies to decorate my weekly page layouts from washi to scrapbook paper to stickers and more. But I never could keep it up like I wanted.

Planner Tips and Tricks with Planner Accessories Organization

Today I’m sharing what has worked, what I’ve changed, and even some new tips that I think will help you stay more organized too. Check out the video below. 


I love these new goodies from the Studio 71 line at DaySpring that match my planner beautifully. The stainless steel tumbler is perfect for coffee, tea, or water to sit on my desk while I’m working. 

Planner Tips and Tricks with Planner Accessories Organization

But I think my favorite is definitely this new canvas pouch. I love the scripture, matching florals, pom embellishment, and yarn tassel.

Planner Tips and Tricks with Planner Accessories Organization

Planner Tips and Tricks with Planner Accessories Organization

I love that it stands on its own making it easy to find supplies when I’m working. Plus check out that peach color lining. I’m totally head over heels. 

Planner Tips and Tricks with Planner Accessories Organization

Now let me know in the comments below what your best planner organization tips are. I would love to know how y’all stay organized. And don’t forget to check out the planner accessories and even more that was just released over at DaySpring. God bless!

Planner Tips and Tricks with Planner Accessories Organization

Today I'm sharing some new planner tips and tricks with planner accessories organization as I update from my last post how I'm keeping daily life organized. 

DIY Mini Notebook Tutorial using Cricut Maker

Check out this DIY mini notebook tutorial using Cricut Maker and their new QuickSwap Toolset that makes it a breeze to create your own personalized projects. 

Thank you to Cricut for sponsoring this post. All opinions are mine alone. I pinky promise! Some of the links below are “affiliate links.” This means if you click a link and purchase an item, I will receive a small affiliate commission that helps me to be able to continue with this blog and hopefully continue to inspire you as well.

I don’t know about you, but I can never have too many journals and travelers notebooks lying around. I’m obsessed with them and always have been. I also love creating my own so I can personalize it anyway I choose. Thanks to my Cricut Maker, it makes creating them even quicker and more gorgeous. 

DIY Mini Notebook Tutorial using Cricut Maker

First of all, make sure to check out more details about the Cricut Maker HERE if you are new to the Cricut machines. When Cricut released the Maker a couple years ago, they promised more tools would also come along as part of their adaptive tool system. More tools means more projects and ideas that can come to life. 

10 Things I Love about My Cricut Maker

These new tools now allow you to deboss, engrave, and more with materials like metal and leather. All you have to do is swap the tool from the housing unit and keep on creating with ease. Learn more about their newest tools HERE

DIY Mini Notebook Tutorial using Cricut Maker

Now let’s get started so you can create your own mini notebook too. The best news about this whole project is that I have already created the design and all you have to do is create it using your Maker. Click HERE for the project in Cricut Design Space. 

DIY Mini Notebook Tutorial using Cricut Maker

DIY Mini Notebook Tutorial using Cricut Maker

Cricut Design Space will walk you through creating the mini notebook by loading your cutting mat with the scrapbook paper into the Maker and also changing out the tools as needed. I even engraved the leather hexie on the cover using the Maker. 

DIY Mini Notebook Tutorial using Cricut Maker

After everything was cut out, I assembled the white cardstock inside the scrapbook paper and just stapled the binding. For the cover, I used the Rob and Bob Lattice paper pack

DIY Mini Notebook Tutorial using Cricut Maker

I then added the leather embellishment to the cover using a glue stick. I love that the Maker can now engrave lots of different materials too. 

DIY Mini Notebook Tutorial using Cricut Maker

Now for the extra fun part. I thought it would be fun to create some fun printable rainbow stickers that coordinate with the rainbow engraved leather embellishment and also the scrapbook paper shown above. 

GRAB YOUR FREE PRINTABLE HERE!

DIY Mini Notebook Tutorial using Cricut Maker

Check out the video below to see the Maker QuickSwap Toolset up close and in detail. I also show the free printable in more detail. Hope you enjoy!


I printed my rainbows on the Avery 8665 clear sticker paper and then cut them out to decorate the inside pages of my mini notebook. I just love the extra touch of color and fun they give this little guy. 

Let me know in the comments below what you plan on making next with the Cricut Maker or maybe you are going to grab your machine now. I can’t wait to see what you create. 

This is a sponsored conversation written by me on behalf of Cricut. The opinions and text are all mine.


Check out this DIY mini notebook tutorial using Cricut Maker and their new QuickSwap Toolset that makes it a breeze to create your own personalized projects. 

Ideas for Organizing Art and Craft Supplies

Check out these ideas for organizing art and craft supplies to make your next projects less overwhelming and lots more fun. 

Thank you to DaySpring for sponsoring this post. All opinions are mine alone. I pinky promise. Some of the links below are “affiliate links.” This means if you click a link and purchase an item, I will receive a small affiliate commission that helps me to be able to continue with this blog and hopefully continue to inspire you as well.

When there is mess and chaos, what should be a fun project suddenly seems overwhelming and exhausting. Keeping myself organized makes it so much more fun and enjoyable. This is really true for all of life but especially when it comes to Bible journaling for me. Check out these ideas and tools to help you stay more organized with your art and craft supplies. 

Ideas for Organizing Art and Craft Supplies

Ideas for Organizing Art and Craft Supplies

The video below shows you several new goodies that I recently discovered that have been keeping my supplies and craft room more organized. I’m sharing lots of different ideas for using them whether you love Bible journaling, are a teacher, small group leader, etc. 


I’m absolutely obsessed first with the black and white color scheme with handlettered verses and encouraging words. These will match anyone’s craft room, classroom, etc. 

Ideas for Organizing Art and Craft Supplies

This carry all case is exactly that! It can carry all your basic essentials for any Bible journaling entry or craft project. From washi tape to paints to watercolors to pens and so much more, you can have all your supplies in one place. How perfect is that for traveling?!

Ideas for Organizing Art and Craft Supplies

Because I love to Bible journal and have to have flexibility with a little one running around, I love that this case has a strap for easy carrying and 5 containers that slide out easily. 

Ideas for Organizing Art and Craft Supplies

The expanding case has me all nostalgic thinking of my grandmother when I was younger and how she would keep all her coupons in one place. Now I can do the same when it comes to stickers, ephemera, stamps, and more. 

Ideas for Organizing Art and Craft Supplies

There are lots of folders inside so you can literally organize everything in its own compartment. Now you won’t lose anything. Each folder has a tab at the top so you can label them and find what you need quickly. 

Ideas for Organizing Art and Craft Supplies

Several ideas I thought of for using this include for leftover pieces from past devotional kits or holding stamp sets. You could also designate this case for one particular project like a devotional kit. Then all the different pieces of that kit could be organized in one place making it easy to bring it along no matter where you find yourself journaling. 

Ideas for Organizing Art and Craft Supplies

I would love to hear your ideas for ways to use these organizers and any other craft supply organization tips you may have. Let me know in the comments below. And don’t forget to grab your goodies from DaySpring!

Check out these ideas for organizing art and craft supplies to make your next projects less overwhelming and lots more fun. 

Simple Organization and Planner Ideas using a Devotional Planner

Try some simple organization and planner ideas using a devotional planner to keep daily life manageable and stress to a minimum. 

Some of the links below are “affiliate links.” This means if you click a link and purchase an item, I will receive a small affiliate commission that helps me to be able to continue with this blog and hopefully continue to inspire you as well.

If there are any ways to keep life as stressLESS as possible, I want to know all of them. Staying organized for me and planning ahead is an absolute must as much as possible if I want to keep my sanity. When I find ways that help, I want to share them with y’all too so you can have the happiest days possible. Life is just too short to not be. In walks my DaySpring Premium Devotional Planner

Using a Devotional Planner to Keep Life Organized

This planner officially releases today too so you can get yours now! How fun is that?! Just in time for July. I recently shared all the details of this beauty with y’all in a flip-through video in case you missed it. I also mentioned before that I would love to show y’all how I’m setting mine up and planning to use mine to stay organized. 

Using a Devotional Planner to Keep Life Organized

For this planner, I took a total turn from how I normally use a planner and couldn’t be more excited. Simple is just better for some seasons of life. See all the details and my page set-ups in the video below. 


I mentioned in the video how I am doing things totally different this year. In the past I have used color coding, washi tape, stickers, etc. But I ended up finding that if I didn’t have all those things and the pages weren’t beautiful, then I felt like I couldn’t allow myself to write things in. This time I’m using a black pen (love the Illustrated Faith 0.25 pen) and a pencil. Nothing fancy!

Simple Organization and Planner Ideas using a Devotional Planner

For me I write in things that I know are more set in stone in ink like birthdays, appointments, etc. and tentative events or blog posts in pencil. I don’t want to use wite-out or mark through things. I may even end up using pencil all the time. Who knows? 

Simple Organization and Planner Ideas using a Devotional Planner

With my weekly view, I am writing in my blog posts with its to-do lists on the right side so I can write in daily to-dos on the left side. I love how the weekly spread also has these boxes for marking things off when they’re done. 

Using a Devotional Planner to Keep Life Organized

Each month has its own devotional which I adore. I went through the one for July and did some markings that I typically do when studying the Word or a Bible study. Then I wrote in some notes of reflection at the bottom that I could read on and focus throughout that month. 

Simple Organization and Planner Ideas using a Devotional Planner

I wanted to mention and share as well the back of the pages so you can see how they handle the ink. Below is a page after using the Illustrated Faith pen which has minimal shadowing and absolutely no bleed through. 

Simple Organization and Planner Ideas using a Devotional Planner

I also had someone in the flip-through video previously to request that I try the Paper Mate Flair pens. I used a black one in the back to write out a prayer of hope. I was pleasantly surprised to see that there was only shadowing too and no bleed through. 

Simple Organization and Planner Ideas using a Devotional Planner

Let me know below too what your favorite ways to use a planner or stay organized are. This Mommy can always use any help she can get. 

GRAB YOUR PLANNER HERE!!

Try some simple organization and planner ideas using a devotional planner to keep daily life manageable and stress to a minimum. 

Using a Devotional Planner to Keep Life Organized

Let’s talk all about using a devotional planner to keep life organized while also nurturing our spiritual journey at the same time. 

Thank you to DaySpring for sponsoring this post. All opinions are mine alone. I pinky promise. Some of the links below are “affiliate links.” This means if you click a link and purchase an item, I will receive a small affiliate commission that helps me to be able to continue with this blog and hopefully continue to inspire you as well.

Life can be crazy, hectic, fun, and so much more on any given day. When you are trying to juggle everything around you, it most definitely starts to feel overwhelming. When I feel overwhelmed, then I’m anxious and things just are running smooth in my house like I would like for them to. If we can make things simpler and easier for us and our families, then why not? My go-to solution for staying organized is with a PLANNER

Using a Devotional Planner to Keep Life Organized

I am so a paper and pencil kind of gal, so I love having a planner to keep everything written down and organized in one place. And in walks this brand new PREMIUM DEVOTIONAL PLANNER from DaySpring as part of their Studio 71 collection. So wait a minute… You’re telling me I can keep all the daily to-do’s of life written down and also have a place to keep prayers, gratitude lists, and even a monthly devotional in one place? Yep, that’s right! 

Using a Devotional Planner to Keep Life Organized

After seeing all these features in this premium planner, I wondered why I had not thought of this idea before. Genius! I have been so anxious in excitement to show y’all all the fun details that make it different. Check out the video below as I flip-through this beauty and show you all the little extras too. 


The planner is now available for pre-order! When you pre-order, you will also receive a FREE surprise goodie bag with washi, stickers, clips, and more. And what’s even better is you will also get FREE SHIPPING. (They will start shipping 6/3.) Check out more features below.

Using a Devotional Planner to Keep Life Organized

Features:

  • Standard Size 8”x19”
  • 2mm Hard Front & Back Cover
  • Large Spiral Bound
  • Monthly Tabs
  • Elastic Band
  • Monthly Devotional
  • Monthly reflection

Using a Devotional Planner to Keep Life Organized

Each month has its own beautiful art on one side and then a devotional on the opposite side with scripture, devotion, reflection, and notes section. 

Using a Devotional Planner to Keep Life Organized

Below are more pictures of the inside of the devotional planner showing the monthly and weekly view, all the unique sections at the back, and also a pocket file. 

Using a Devotional Planner to Keep Life Organized

Using a Devotional Planner to Keep Life Organized

Using a Devotional Planner to Keep Life Organized

Using a Devotional Planner to Keep Life Organized

Using a Devotional Planner to Keep Life Organized

I think my favorite part is the devotional content and the extra sections at the back that really make this planner more of a life organizer for both my home and my spiritual well-being. Are you a paper planner type of girl? I would love to hear in the comments below. 

PRE-ORDER NOW FOR FREE SURPRISE GOODIE BAG + FREE SHIPPING!!

Using a Devotional Planner to Keep Life Organized

Let's talk all about using a devotional planner to keep life organized while also nurturing our spiritual journey at the same time. 

Update on My Illustrated Faith Planner and Tips for Organization in Your Life

Today I’m showing you an update on my Illustrated Faith planner and tips for organization in your life. I’ve been using mine for both a home planner as well as scripture writing and love the way it is going.

Some of the links below are “affiliate links.” This means if you click a link and purchase an item, I will receive a small affiliate commission that helps me to be able to continue with this blog and hopefully continue to inspire you as well. 

Any other planner fanatics out there like myself? I love having a paper planner with everything written down and organized right in front of me. I love adding fun details, stickers, and washi tape to make the pages even prettier. A little while ago, I shared with y’all the new 2018-2019 planner from Illustrated Faith and Dayspring.

Using a Planner for Scripture Writing and Prayer Journal

I thought it would be fun to share an update on how my planning has been going since then as I wanted to use it for home and blog planning as well as scripture writing. Plus I’ve also got some more great tips for organizing your life and how to use your planner to do so. Hope you enjoy the video (or keep reading if that’s more your style).

I decided this month to keep things a little more simple and added a thin strip of washi to the top and center of each page to divide one side for life planning and the other side for scripture writing. I added a few stickers for embellishments as well.

Update on My Illustrated Faith Planner and Tips for Organization in Your Life

I also found that not designating a particular color washi or pen for each category of my life made it so much easier to stay organized because I didn’t feel constrained if I didn’t have it with me. I wanted to be able to go ahead and jot things down before I forgot. Use whatever system works best for you though.

I absolutely love this planner and all the designs so much and hope you will grab yours if you haven’t already. It is an 18 month planner so it will go through the end of 2019. That’s great because it’s not too late to grab yours.

Update on My Illustrated Faith Planner and Tips for Organization in Your Life

Today I'm showing you an update on my Illustrated Faith planner and tips for organization in your life. I've been using mine for both a home planner as well as scripture writing and love the way it is going.

Using a Planner for Scripture Writing and Prayer Journal

Check out how I’m using a planner for scripture writing and prayer journal with a complete tutorial of how to make your weekly layout.

This post is sponsored by Dayspring. All opinions are mine alone. I pinky promise! Some of the links below are “affiliate links.” This means if you click a link and purchase an item, I will receive a small affiliate commission that helps me to be able to continue with this blog and hopefully continue to inspire you as well.

I recently asked all of you on Instagram what you would rather see, Planner Layout or Scripture Writing/Prayer Journal, in an upcoming blog post. Well an overwhelmingly majority of y’all said Scripture Writing so I’m here to deliver today. I recently was given the new 2018-2019 Illustrated Faith Planner from Dayspring and couldn’t wait to try this new idea for the upcoming year.

Using a Planner for Scripture Writing and Prayer Journal

As usual, I thought it would be fun to show the entire planner so you can see all its features and designs in a video. I also included a weekly layout showing not only how I’m using the planner to stay organized with my life and blog but also for scripture writing and recording prayers. Enjoy the video below, and then be sure to come back over to order yours today!

With washi tape and a few stickers, I have a whole layout complete in no time. I can still stay organized with my home and blog in one column on each page and then write scripture and prayers on the other columns. I love being able to stay organized and focus on scripture all in one place.

Using a Planner for Scripture Writing and Prayer Journal

I added a journaling card to the coil and jotted down a prayer on the back to focus on for that week.

Using a Planner for Scripture Writing and Prayer Journal

Using a Planner for Scripture Writing and Prayer Journal

Using a Planner for Scripture Writing and Prayer Journal

Make sure to check out the planners from Dayspring including this one from Illustrated Faith. They also have several other styles and designs with the same basic layout. Order yours today and don’t forget to use the coupon code IFSHIPSFREE at checkout if you order the Illustrated Faith edition or any of their other products.

Check out how I'm using a planner for scripture writing and prayer journal with a complete tutorial of how to make your weekly layout.


My Favorite Things Craft Edition featuring the Date Stamp

I’m so excited to be back with the next part of a new series featuring some of my favorites. My Favorite Things Craft Edition featuring the date stamp is going to be a fun one. Date stamps are perfect for remembering any event. 

Some of the links below are “affiliate links.” This means if you click a link and purchase an item, I will receive a small affiliate commission that helps me to be able to continue with this blog and hopefully continue to inspire you as well.

I started this new series last month where I will be featuring a new favorite from my craft stash, whether new or old, to share with y’all. The idea came to me after getting questions about what specific items I like to use so I thought it would be fun to highlight them. The first part featured the Heidi Swapp Minc Machine so be sure to check out that post as well.

For this month, my featured item may seem small, but is absolutely a favorite and must-have of mine. What is this special tool of mine? The Date Stamp! You must be thinking, “A date stamp, that’s all?”. But yes, they are amazing. You can find different brands with different style fonts and options. Some even come with more than just dates with phrases for different occasions.

Faber Castell Gelatos Tutorial for Bible Journaling

I have several different brands that I trade out using. And yes, one of those is also Heidi Swapp brand. Don’t laugh at me too hard since we just talked about her minc machine last month. She isn’t paying me to say any of these things. I just love the style font honestly. I also have an American Crafts brand that I really love. I keep one in my office and the other one in my Bible journaling travel bag to have handy when leaving the house.

Spend some time meditating on the Word during this Christmas season by illustrating advent in your journaling Bible. Check out this Christmas Bible journaling entry with gelatos tutorial now.

The reason why a simple date stamp is making my top lists of favorite items is because it marks a memorable moment in my life or a highlight in my spiritual journey for that particular season. Because I primarily use it in my journaling Bible, I love being able to flip back to old entries and knowing exactly when I made that page. I can usually tell by my journaling what I may have been going through at that time and see where I’ve grown from it. I also love that if the date is a milestone moment and something big happened, then I know exactly when it was for years to come.

Tips for Bible Journaling No Matter the Artistic Skill Level

Now couldn’t I just due the same thing by writing in the date with a black pen? Yes, I sure could, but where’s the fun in that. The stamp is adorable and also gives a little vintage feel and texture to the page that wasn’t there before. Also try considering using yours in your planner. (Check out this one if you are looking for a new one. It’s 50% off right now too.) Especially if your planner is blank and you can add in your own dates for each month. That would be a super fun way to dress up the pages with a simple touch. I use mine some in my planner to date each day of the week on my weekly spread. The picture below shows where I dated the page in a devotional booklet or journal.

Tips for Bible Journaling No Matter the Artistic Skill Level

Let me know in the comments below if you have used a date stamp and if you have any other suggestions for places to use it. I would love to have some new ideas. If you have never tried one and end up getting one, I can’t wait for you to have some fun. God bless!

I'm so excited to be back with the next part of a new series featuring some of my favorites. My Favorite Things Craft Edition featuring the date stamp is going to be a fun one. Date stamps are perfect for remembering any event. 

Create a Portable Homework Station using a Serving Tray

Get ready for the next school year when you create a portable homework station using a serving tray that can move around to any corner of your house helping take the stress out of school work. 

This post is sponsored by Dayspring. All opinions are mine alone. I pinky promise! Some of the links below are “affiliate links.” This means if you click a link and purchase an item, I will receive a small affiliate commission that helps me to be able to continue with this blog and hopefully continue to inspire you as well.

Now let’s just go ahead and face it. I know none of us want to even start talking about that dreaded work that starts with an “S”. School, yes and that means homework will be soon to follow. As much as we don’t even want to think about it, back to school time will be here before we know it.

Create a Portable Homework Station using a Serving Tray

I love summer, and I’m enjoying every minute of it. But I do know that reality will be slapping me in the face again very soon with early alarm clocks, packed lunches, and schedules to keep. That’s why I want you to be able to prepare ahead to eliminate as much stress as possible when you create a portable homework station using a serving tray.

Create a Portable Homework Station using a Serving Tray

Most of you probably have a desk in your child’s bedroom or a common area with a family computer, but let’s be real once again. Getting your kids to do their homework isn’t always this beautiful scenario where they sit down perfectly at their desk and get straight to work. Getting them to work in any room or space is a success. This portable homework station makes it where you can go straight to them for any help they may need.

Create a Portable Homework Station using a Serving Tray

I am using a three shelf cart that is metal with wooden shelves. It does roll on wheels which makes it portable but not so much if I have a printer plugged in. This wooden tray is from Dayspring and works perfectly for this especially with the vintage style map on the bottom. Plus the wood is extremely durable and will withstand many future school years.

Create a Portable Homework Station using a Serving Tray

I decided to place my serving tray on top with different school supplies that could be easily transported. I placed index cards, sticky note pads, calculator, memo book, glue stick, and crayons.

Create a Portable Homework Station using a Serving Tray

Sitting on the shelving beside the tray is this gorgeous tabletop globe that I fell in love with immediately. You can grab this beauty from Dayspring as well. It matches the tray perfectly and is part of their (in)courage collection. *Y’all know how much I love the (in)courage community. This handlettering, “We all belong to each other,” is just precious. Plus the globe could be used for any geography homework too.

Create a Portable Homework Station using a Serving Tray

Sitting on the top is a cup holding pencils, colored pencils, highlighters, and scissors. Place the cup on the tray and just take it wherever you need it. *I think I might just have to make one of these designated for my favorite Bible journaling supplies too.

Create a Portable Homework Station using a Serving Tray

Now how cool is it that you have one less thing checked off your list when school starts back. That first homework assignment your kids bring home will be a breeze when everything is organized and right at their fingertips.

Make sure to grab your serving tray and globe now to have time to get yours together. The great news is that they are now on sale at 50% off but only for a limited time so you better get them now!!!

Get ready for the next school year when you create a portable homework station using a serving tray that can move around to any corner of your house.