Banners are very popular right but actually have been for many years and seem to be making a come back right now. I remember as a child, every birthday there would be a birthday banner hanging downstairs in my family’s living room. The birthday banner was a guarantee for every member of our family on their special day. When the banner started to become worn and not so cute anymore, we didn’t just throw it out but had to get another one to keep the tradition going. I think banners are perfect for not just birthdays but any occasion.
As I may have mentioned before my husband is Irish, or at least part Irish. I figured a banner that says “Kiss Me I’m Irish” would be perfect since that’s exactly what I like to do to him. Wink wink! Now you could make your banner say anything similar like “Luck of the Irish” which is also on a wood sign hanging over our kitchen door. It could even be just as simple as “Happy St. Patrick’s Day.”
Let’s get started and let the celebrating and creativity begin.
You are going to need several supplies:
Cardstock/Scrapbook paper- I used a variety of green patterned paper.
Paper trimmer
Ribbon- Green or I found my adorable ribbon at Joann with a shamrock pattern.
Alphabet punch out letters- Precut letters are simple and cute but I also considered cutting the letters out with my cricut. It is totally your preference.
Adhesive runner- or some other kind of adhesive for gluing letters to banner
Shamrock template- My template was found at http://www.squidoo.com/free-saint-patricks-day-clip-art-images. You may also choose to cut out a shamrock on a cricut if you would like.
Lip template- This template I found was at http://sweetclipart.com/simple-red-lips-design-870.
Scissors
Pencil
Hot glue gun with glue sticks
To begin you will want to measure out your individual flags that make up the actual banner. This is where creativity really places a huge part. It is your creation so whatever design paper and size you would like is your choice. Feel free to cater my particular selections to your own preference.
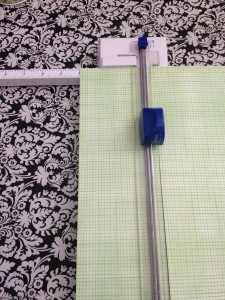
Each flag is 6” in length and 4” in width. My scrapbook paper measured 12”x12” so out of each piece of paper, I was able to cut out 6 flags. Using your paper trimmer, which usually has a ruler attached, measure your paper and cut out the flags. Because I wanted my flag to say “Kiss Me I’m Irish” with a set of lips and a shamrock as well, I cut out 15 flags total. I used two different patterns of paper to have the flags for the words “Kiss Me” and the set of lips on one color of paper and “I’m Irish” and the shamrock on another design of paper.
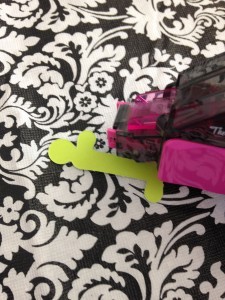
Now punch out your letters to spell what you would like. If you are using the alphabet punch-outs, be careful when punching them through to not tear a letter (I learnt this the hard way. Lol.). My letters are all different sizes and fonts which I didn’t mind but thought it made it look a little more fun instead of formal. If you are wanting that uniform look, then choosing the same font and size would be fine as well.
Another great option would be to use a cricut to cut out the letters.
Trace out your shamrock and set of lip templates on scrapbook paper next. Be sure to use paper that will stand out and not blend in once attached to your flag.
Using an adhesive runner, attach your letters and shapes to each individual flag being sure to spell out your particular phrase. Any adhesive would work fine or even using mod podge. I found the adhesive runner is the simplest and quickest method.
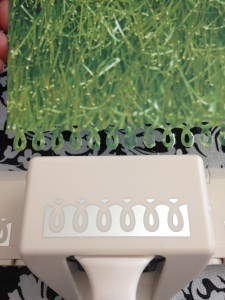
You can be finished with your flags at this step or if you are wanting some extra flair, I suggest using a paper punch. I found the one below at Joann.
I punched the bottom side of my flag and absolutely love the design it created. These type of paper punches are especially easy because you can use the design to the left of the actually punch to line up your paper to ensure you are getting an accurate punch and design (See picture above.).
Instead of using a paper punch, another way to add flair to the flags would be to cut an upside down V shape in the bottom causing a point on each side of the flag at the bottom. The possibilities really are endless! That’s what I love about crafts- the pure creativity.
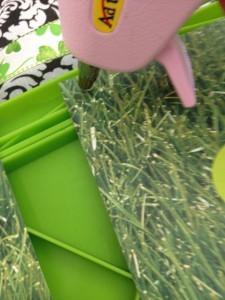
You will now need to add your ribbon to the top of each flag in order to be able to hang it up. I used a hot glue gun which worked great. I was concerned about the glue coming through the ribbon possible or burning myself but the ribbon I had wasn’t thin and didn’t cause a problem. I have used a more transparent ribbon that was thinner on other projects and found the glue was easy to come through the ribbon and burn my fingers. Use caution when using the glue gun.
Go ahead and line up your flags being sure to spell your phrase correctly before actually gluing to ribbon. I left about 4 inches of ribbon before gluing the first flag in order to have room to hang it. Place a dot of hot glue on each corner at the top and one in the middle. Gently press down the ribbon being sure to line it up straight with the flag. Continue adding each flag and gluing the ribbon to each one. I spaced each flag about 1 inch apart.
Because of the location I was hanging my flag in, I decided to break up my phrase into two separate banners. If you prefer one long banner, great! It really all depends on the space you will be using it for.
Last enjoy your creativity and hang your banner in a special place for everyone to see this St. Patrick’s Day.
Mine is actually hanging behind my kitchen table in the dining room over my set of windows. I find this is a common and fun place to hang my banners because my husband and I normally end up eating some kind of fun food for that holiday as well. The banner just seems to add to the festivities. Another great place to hang your banner would also be on a mantle.
As always, do not forget to enjoy the little things in life!


