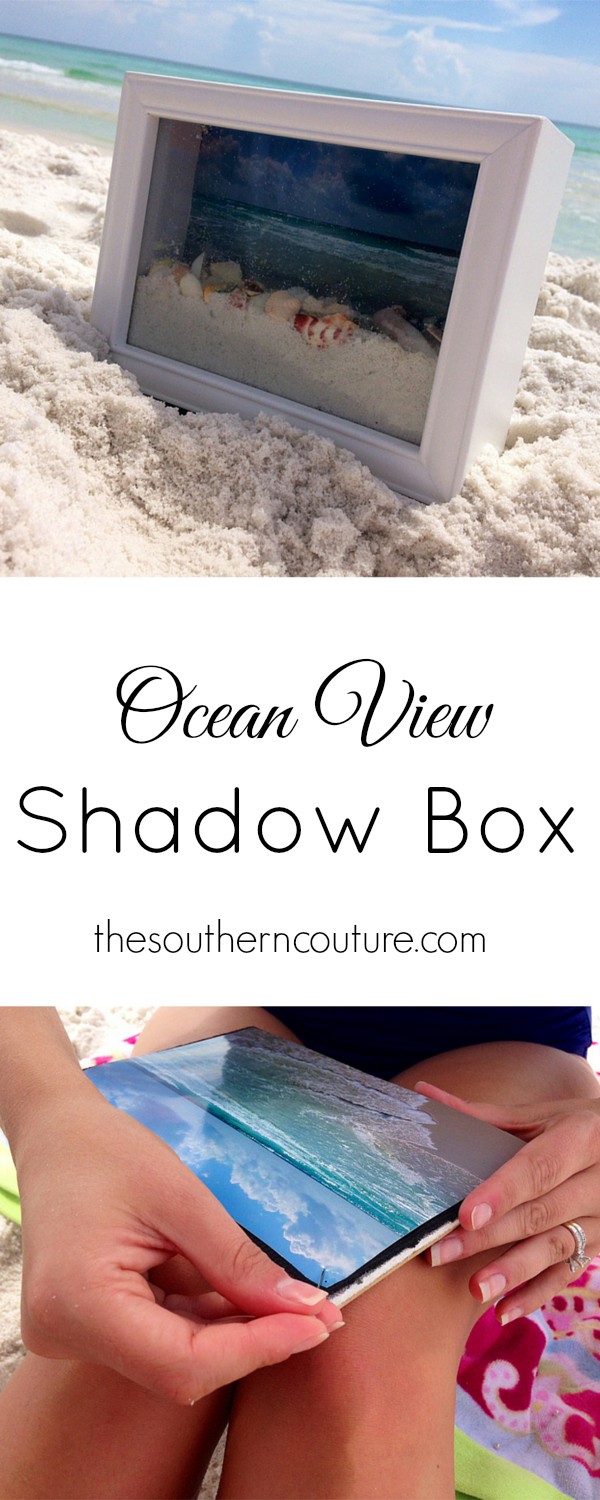
One thing I love about going to the beach or on vacation are the memories that we make. This ocean view shadow box is a perfect way to keep the memories alive and display in your home for others to enjoy as well. With fall on its way, it is easy to forget about those seashells that your kids collected and are still stuffed in the bottom of the beach bag. Take them out, print your favorite vacation picture from this summer, and enjoy the memories all year long.
I always seem to come home with seashells, postcards, room keys, etc. and but don’t always use them but don’t want to throw them away either. Sometimes they end up sitting in a drawer and are forgotten. Now not only can we enjoy the memories but also others who visit us in our home. The beach is one of my favorite places and I never want to forget those good times.
Your kids can also get involved with this and share their ideas on how to remember their summer vacation. It is easy for them as well to help you create and put it together. Not that school has started, it’s never a bad thing to look back and smile on summer memories.
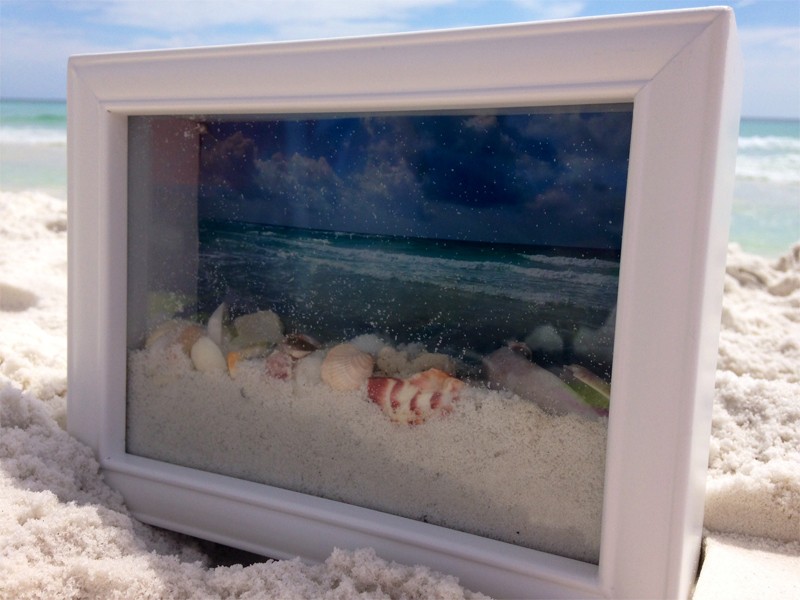
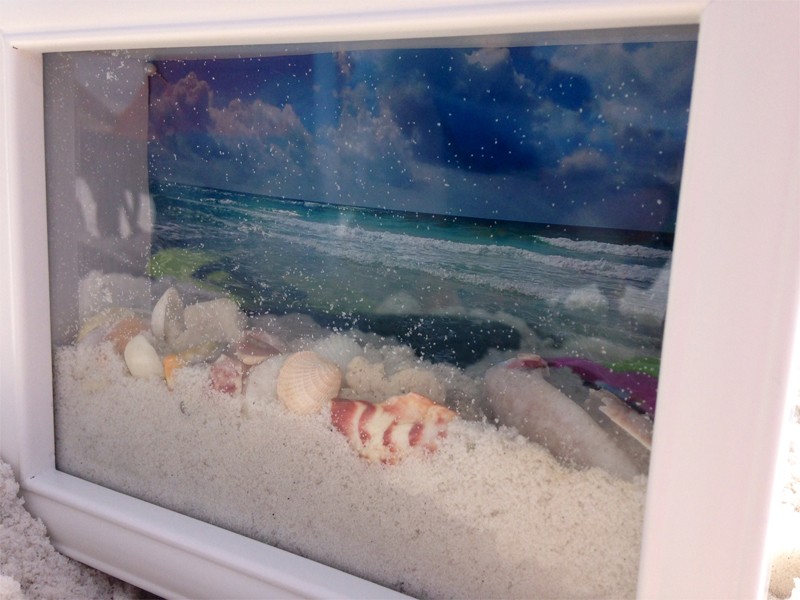
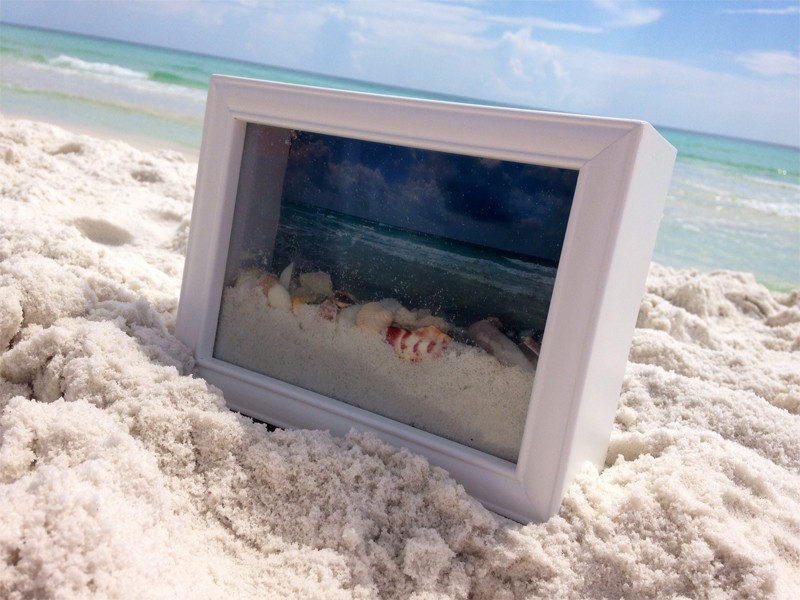
The reason I love this shadow box more than just any ordinary one is that the picture with the beautiful ocean view, sand, and seashells gives a glimpse or picture of the beauty we enjoyed while there.
What you will need:
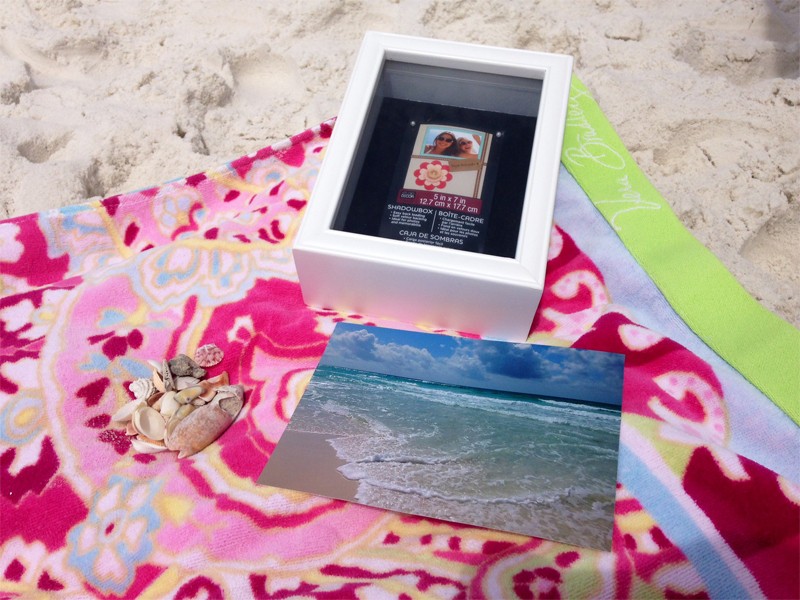
Shadow box: I found mine at Michaels for 40% off making this project very inexpensive. I plan to do this for each vacation we take and eventually build a collage wall of trips and vacations so I didn’t want it to be too big to start with.
Picture from a recent trip
Seashells or you could also use any other small objects from your trip
Straight pins or scrapbooking adhesive squares: My shadow box came with straight pins that I used to attach the picture.
Let’s get started!
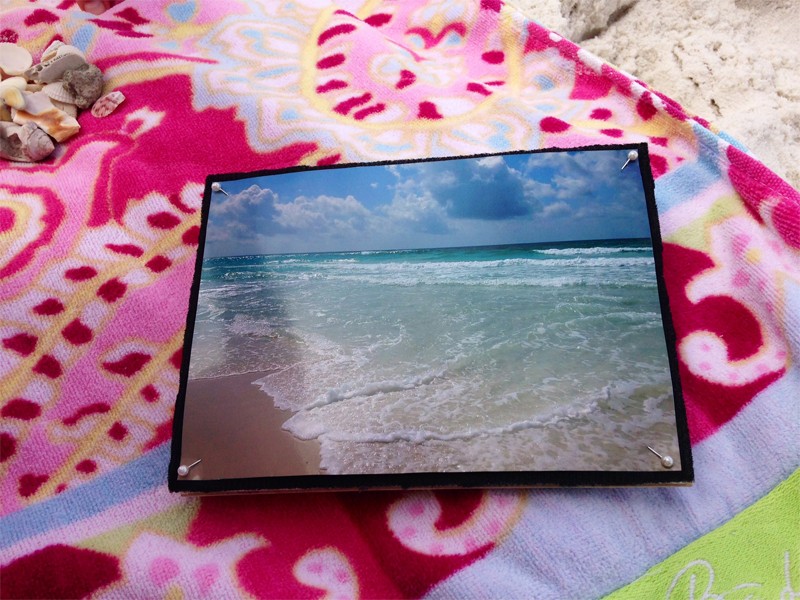
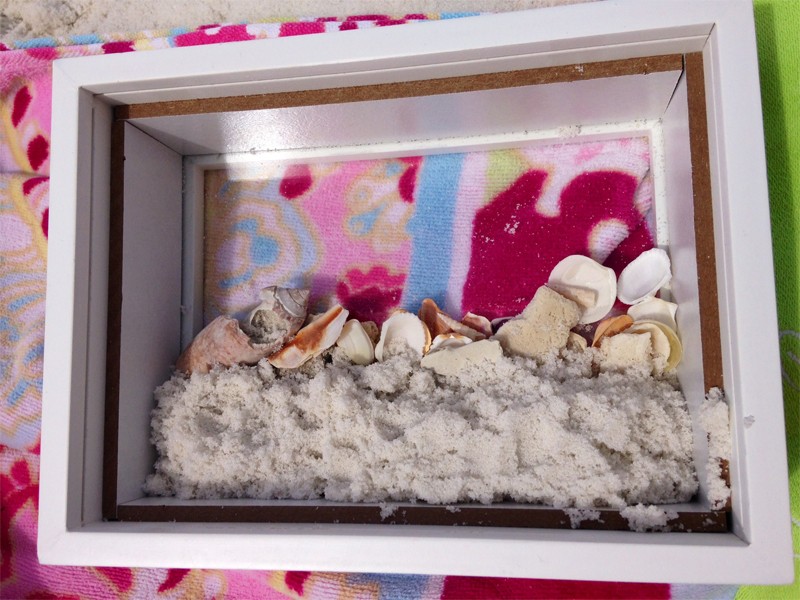
Remove the back of the shadow box and place your picture on the back wall of the box. You may want to attach with scrap booking adhesive squares first and then place straight pins in the corners for extra support and also decor if they have the pearl or colored tip on them.
Placing the seashells and sand can be sort of messy but don’t worry. It doesn’t have to look perfect with everything places perfectly. The beach doesn’t look that way either.
It would also be easier if the top of the shadow box would open as well and you could drop the sand and seashells in but mine didn’t. Maybe you can find one that does.
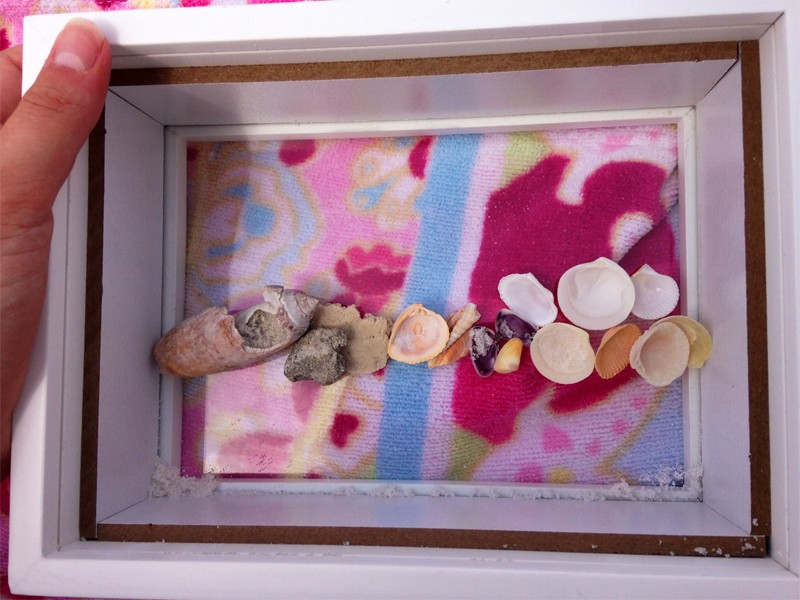
I laid the shadow box flat and placed my shells randomly on the glass. Depending on your picture will depend how far up the glass you want to cover it with the shells and sand.
Next I started laying my sand on the bottom portion of the box below the seashells and on part of them. I used a picture of the shoreline with the water and sky so I wanted the seashells and sand to cover the bottom of the picture and make the picture sort of come alive.
Replace the back of the shadow box with the picture and secure it in place. Slowly and gently turn it over and see your finished project. Because of the sand and seashells moving easily you may need to turn it over and do some more placement but like I said before, don’t try to make it perfect.
Also write the year of the vacation or the year and month on the back of the shadow box so in the future you will not become confused on which vacation it was.
I love being able to look at this shadow box and smile on fond memories of a wonderful trip. I know that you and your family will be able to do the same as well.
Enjoy looking back on good times and looking forward to making more great memories in the future. But most importantly enjoy the little things in life each and every day!!
Please feel free to share your pictures or memories of your recent summer vacation in the comments below. We love to hear of other great places to travel and things to enjoy while traveling.
If you enjoyed this simple project then be sure to also check out the School Year Memory Jar, Photo Coasters, and Bathroom Mirror Revamp.
Also if you have not already, please join me on Facebook, Pinterest, Instagram, and Twitter. I would love to hear from you with any comments, suggestions, or ideas you may have.
Some of the links in the post above are “affiliate links.” This means if you click on the link and purchase the item, I will receive an affiliate commission. Regardless, I only recommend products or services I use personally and believe will add value to my readers.
ENROLL NOW IN MY 5 DAY BIBLE JOURNALING ECOURSE FOR FREE!

Get exclusive tips and tricks with my 5 Day eCourse available exclusively to subscribers!


My goodness what a fabulous project. That photo of the shadow box on the beach is not only genius but also so pretty!! Thanks for sharing at Outside [the Box]. We’d love to see other projects up your sleeve, every Tuesday at 5pm EST. http://bit.ly/Outside-the-Box
Thank you! Plan to return and share more in the future. Thanks for stopping by.
Your project is beautiful. Thank you so much for sharing it. I can’t wait to make one of my own. 🙂
I am so glad you loved it. I really love being able to remember my memories from vacation throughout the year. Tag me in a picture of yours on social media when you make it. I would love to see how it turns out.
Bethany, I really love this idea, I been doing the vacation in a jar . Im going to try this shadow box beach we just came back from florida vacation. Thank you so much, keep the ideas coming! Sharon Upole
Thank you! I love the idea of the jar too. That’s great. The cool thing about this shadow box is that you can include your favorite family and vacation photo.
Did you have any issues with the sand leaking from the box? I’m wondering if I need to seal the seams in some way…..
I sure don’t. I didn’t seal them either. I just poured the sand in and it worked great!
We have done these the past few years. If sealing is an issue and sand is falling out we just use hot glue around the openings/back to make a seal. We try to get a pic of the kids doing something, like walking in front of the ocean or playing in the sand. It is great idea and love the tutorial.
I haven’t had any problems of sealing so far, but thank you so much for this suggestion. That is a great idea. I will definitely have to pass on to other readers. I like having your family or children in the pictures as well.
LOVE this! Next time I visit my favorite beach, I’ll be sure to collect my favorite shells, seaglass, and sand. Can’t wait to complete this project. Great idea.
Mandie from YellowDogPinkPig
Thank you so much! It is such a great way to keep those memories alive throughout the whole year until visiting again. I would love to see how yours turns out too.
Such a wonderful project. My sis & I just came back from Florida & the GA mountains. I will be doing a box for both. Small rocks,leaves, twigs, & pine cone pieces will work great for the mountains.
That is such a good idea too. It would be perfect to use for so many different types of vacations and trips. What part of GA mtns did y’all visit? I’m from North GA.
Bethany, we were in Blue Ridge, GA & rented a cabin up on Cherry Mountain. Such a beautiful area. Are you close to there?
Carol
We loved your inspiring idea so much that we posted your link on our blog. http://miniowls.com/1/post/2015/09/what-do-you-do-with-your-summer-treasures.html
Thank you
I am so glad you enjoyed it. Thanks so much for sharing it with others!
What a lovely beach and ocean shadow box. Your explanation of the simple steps makes me feel as if I can do one myself. I used to collect Ginny dolls, which were the popular dolls when I was a girl, back in the early-to-mid 50s. I have 4 or 5 of them still packed away after my latest move, from North Carolina to an itty-bitty town in the Portland, Oregon metro area. (That was a loooonnng drive for my Miniature Poodle and me.) Putting the Ginny dolls in scenes from the 50s would be fun, and a deep shadow box would be one way to do it. I’m bookmarking this page and also pinning it to my Pinterest account, so that I can review your steps. Thanks so much for sharing! Marian
You are so welcome! I am so glad that this gave you inspiration to use for something else. That is always my intention so you can make it your own.
I did this project with the the glass block the decorative ones that where you can pour everything in the top hey I put a picture on the back of mine I put something else in mind I’m sure you can glue the picture on the back
That is such a good idea. I didn’t even think about using one of those. I bet it looks awesome because you can see the objects all around. I would love to see a picture of it.