Magnetic chalkboards bring back so many memories from my childhood. At least the chalkboard part does. I remember the mess of the powder from the chalk flying all over my bedroom as a child. So I got to thinking the other day. I need to bring the chalkboard back. What better way to do so then to make mine own! I love a good craft project and especially one that is very affordable, easy to make, and not very time consuming.
The great thing about this particular chalkboard is that it is going to also be multi-functional. You will able to also use it as a magnetic board. I love the idea of being able to write reminders or notes in chalk but also hang a picture or any other note with the magnets.
Let’s get started!
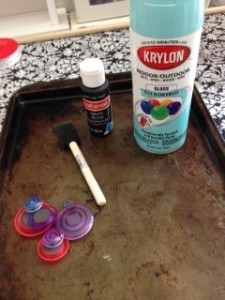
Here is what you will need:
Metal cookie sheet
Spray paint
Chalkboard paint
Foam brush
Magnets
Chalk
Ribbon- if desired
First you will want to clean off your cookie sheet if needed to avoid any dirt or dust being glued onto cookie sheet and showing up in paint. I found mine at a yard sale as I find many other items for different craft projects. I think I bought 3 for very cheap. They were beat up looking and scratched, but it will not matter since you are going to spray paint it anyways.
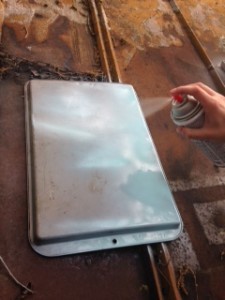
Spray paint your cookie sheet. I choose to spray the bottom side of the cookie sheet because of the look I wanted when hanging it up on the wall or placing it on a metal stand.
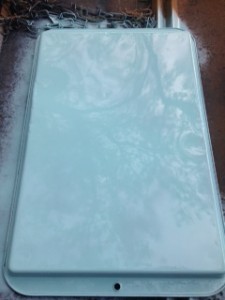
I choose a glossy turquoise blue which I am loving recently. Be sure to cover cookie sheet completely. Allow to dry and spray paint another layer if needed to avoid any metal showing through your spray paint.
Once your cookie sheet is dry, you are now ready to add your chalkboard paint. It just blows my mind that chalkboard can be painted on. I choose a black chalkboard paint that would match well with the turquoise blue. I also saw the dark green chalkboard paint when I was in the craft store for a more traditional look. The dark green would look great too depending on the color you choose for your spray paint.
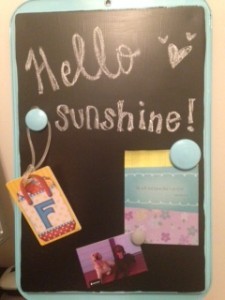
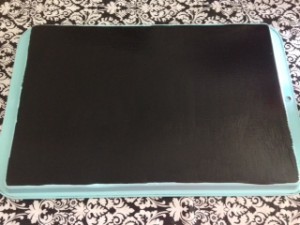
Be sure to read the paint’s bottle for directions before starting. The brand I bought had specific directions which may be for all chalkboard paint. Also decide where exactly you want to paint the chalkboard. You could do a certain section or in a certain shape. I choose to paint the entire cookie sheet on the bottom side leaving the turquoise blue to still show around the edges.
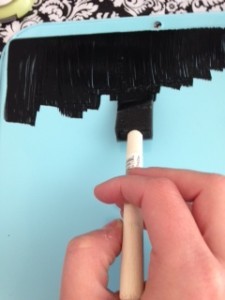
First paint one layer with your foam brush horizontally across the cookie sheet. You may see some streaks from the brush making it appear the spray paint will show through, but do not worry. Once you paint another layer, it will be covered completely.
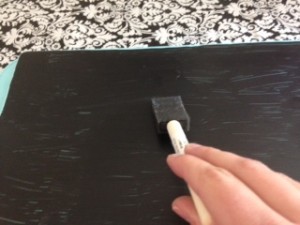
Wait one hour before painting another layer to allow the first layer to completely dry. Paint a second layer now being sure to paint vertically this time.
You will start to see the streak marks disappear and the cookie sheet being covered completely.
Once the chalkboard paint has dried, there will be a solid coating that looks smooth. I was concerned when painting mine that the streak marks at first would look tacky but have no fears. The finished product looks great.
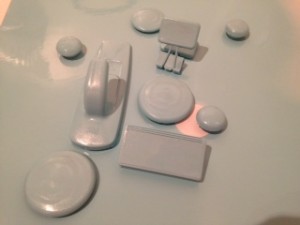
Now if you want to buy some cute decorative magnets, then that is fine. I personally always love a good DIY so why not recycle by using certain small objects. I spray painted several items that I found in my desk drawer and around the house. I used a 3M hook, a binder clip, and other decorative magnets that I wanted to match so I spray painted them as well. Be sure to coat the magnets completely especially if you are using other small objects that may have certain pictures that you do not want to show.
Once your objects have completely dried, you will need to add an actual magnet in order to make them magnetic of course. I had some magnets that I just glued to the objects with my hot glue gun. I also had some magnets that had an adhesive on the back of them that are much more easily applied.
My cookie sheet had a hole at the top of it that can be used for hanging on a hook. You can also thread ribbon through the hole and tie a pretty bow for a little something extra. The ribbon is also useful to hang up the magnetic chalkboard as well. I looked for a pretty ribbon at my local craft store to match the turquoise blue I painted on the cookie sheet but did not find one that I particularly liked. I plan to keep looking as I like the appearance of adding the bow. I do suggest though getting a ribbon that is wire edged in order for the bow to hold its shape.
There is still one last step to make this magnetic chalkboard complete. And of course that’s the chalk. Write your family a special note, remind your husband or children of a particular appointment, write down the menu for a special family dinner, or just about anything else you want to say. Depending where you hang your magnetic chalkboard, depends on what your message would say.
One room that I think this magnetic chalkboard would be perfect in is the kitchen. As I mentioned above, writing down a menu for a special family dinner that your family can look forward is a great idea. But along with the menu written down, you can use your magnets to hang the recipe card you will need later that night. This will make it much easier to find helping to get dinner on the table even quicker.
Your children would also love the magnetic chalkboard in their bedroom to draw pictures and play with their friends. I love using mine in my office with inspirational quotes, pictures, etc.
I hope you enjoy your magnetic chalkboard. Also be sure to check out the magnetic frame board I made using a picture frame, sheet metal, and some fabric. You will love it just as much. As always, do not forget to enjoy the little things in life!
Also if you have not already, please join me on Facebook, Pinterest, Instagram, and Twitter. I would love to hear from you with any comments, suggestions, or ideas you may have.
