Learn how to make stickers with Cricut cutting machine for Bible journaling, planners, and more.
Some of the links below are “affiliate links.” This means if you click a link and purchase an item, I will receive a small affiliate commission that helps me to be able to continue with this blog and hopefully continue to inspire you as well.
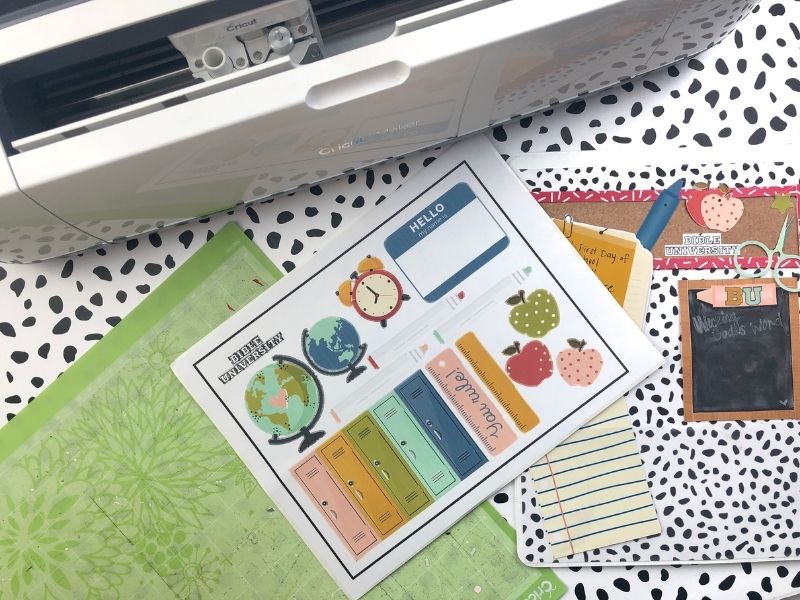
Making stickers with your Cricut cutting machine is completely a game changer! Trust me!! Once you learn, you will be a sticker making machine. Say goodbye to those fussy cutting scissors!
Today I am walking you through all the steps from Cricut’s Design Space to actually using your machine. I couldn’t be more excited for this one either as it is my most requested video yet!! Here is the link for the white sticker paper I use as well.
VIDEO TUTORIAL
In the video below I am sharing the steps using my ipad and the Design Space app and my Cricut Maker. *Keep reading below to see screenshots using Design Space on a desktop and step-by-step written instructions.*
DESKTOP SCREENSHOTS & STEP-BY-STEP INSTRUCTIONS
Below are screenshots from a desktop taking you step-by-step through making your own stickers.
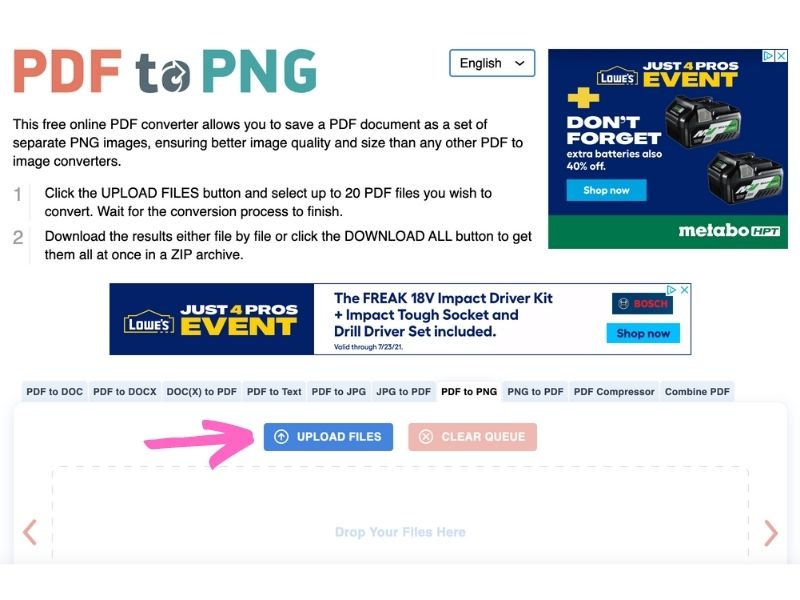
1. You need your printable file that you want the Cricut cutting machine to make stickers out of in an acceptable format for Cricut Design Space. I convert my PDF files into PNG files using THIS site. Click “Upload Files” and then find the file saved on your computer and double click to start uploading it on this site.
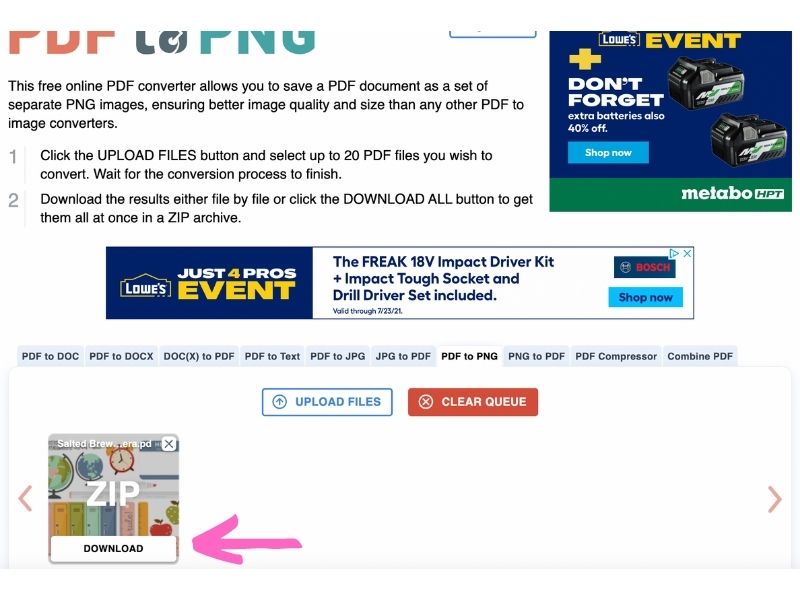
2. The site will convert to PNG. Then click “Download.”
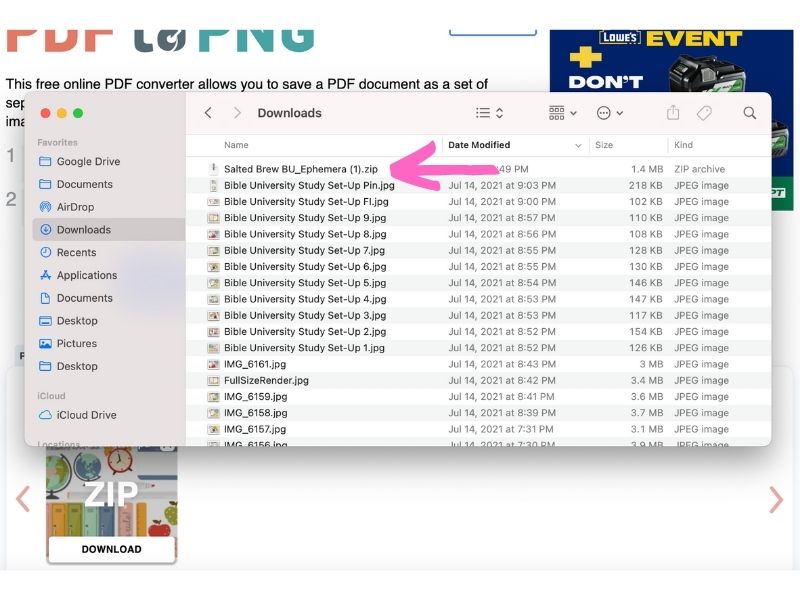
3. A screen will pop up with the zip file. Double click the zip file.
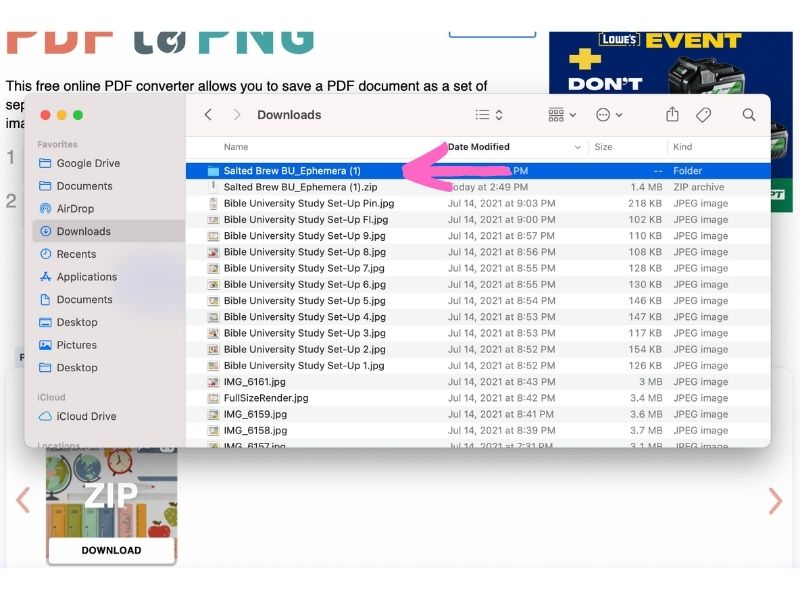
4. Double click the folder to see the separate files.
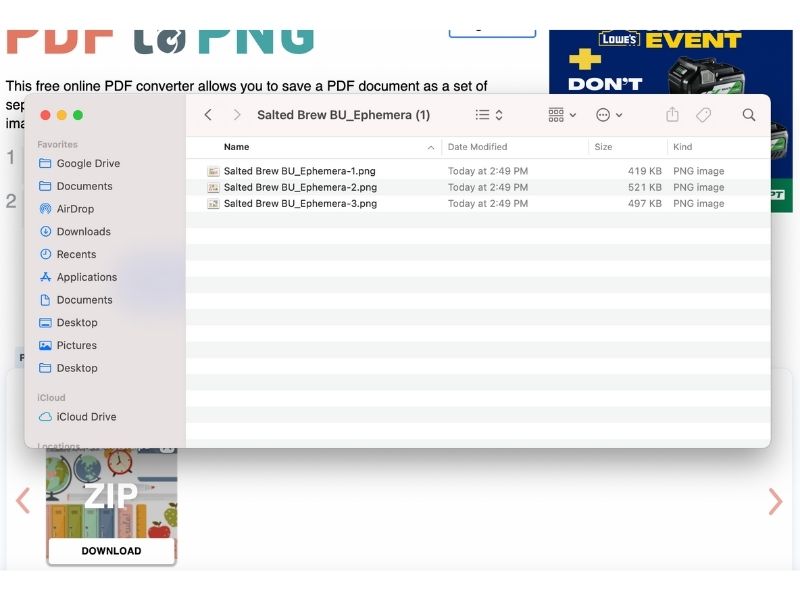
5. The files are now in PNG and in a separate folder so you can upload into Design Space.
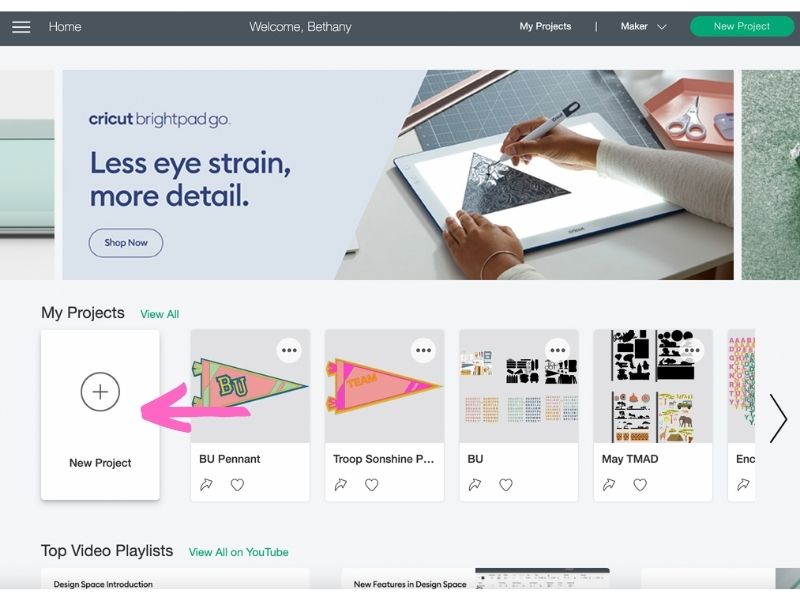
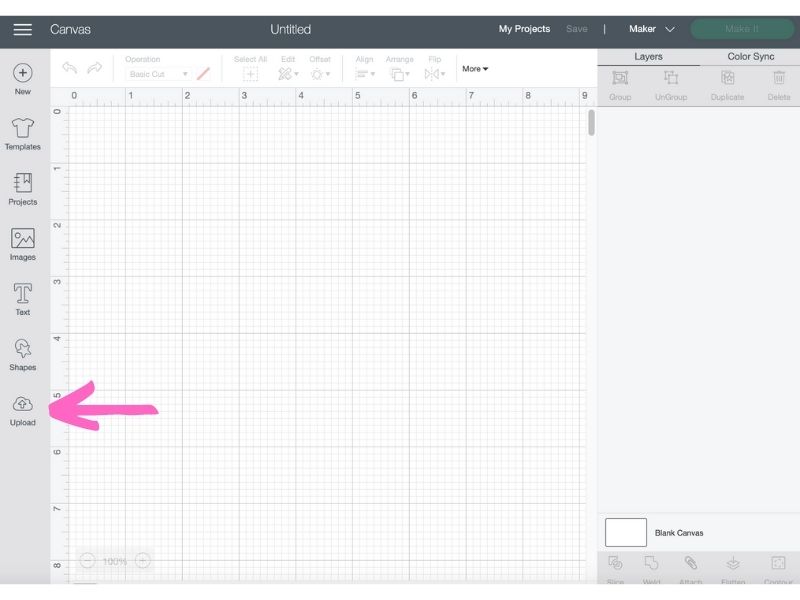
6. Open Cricut Design Space. Click “New Project.”
7. Click “Upload.”
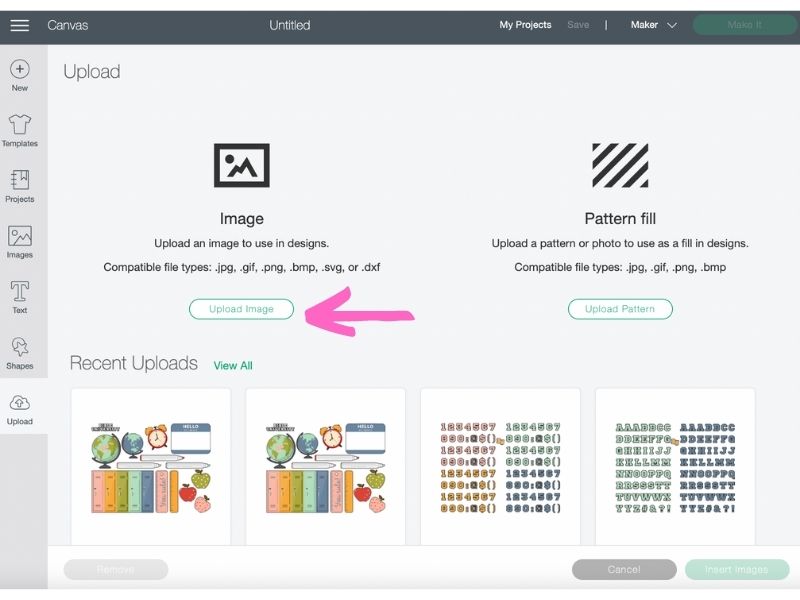
8. Click “Upload image.”
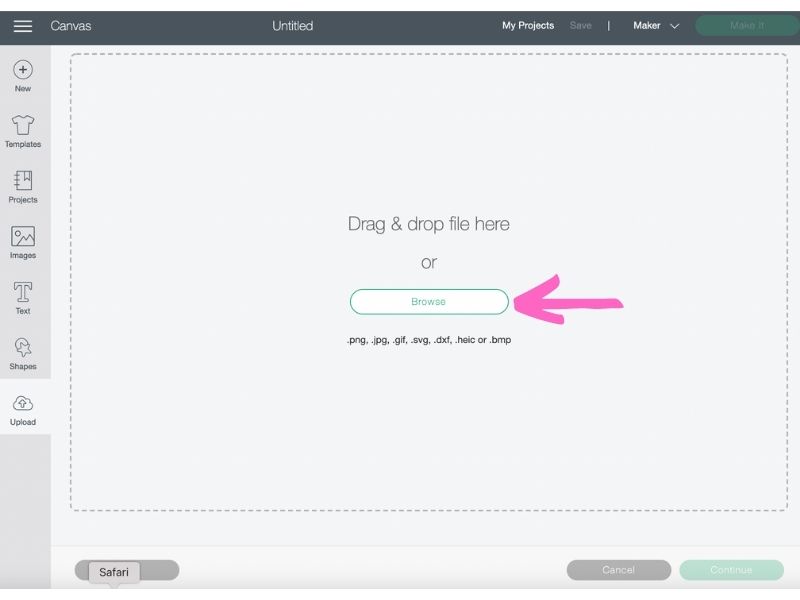
9. Click “Browse” to find the new files we just converted to PNG.
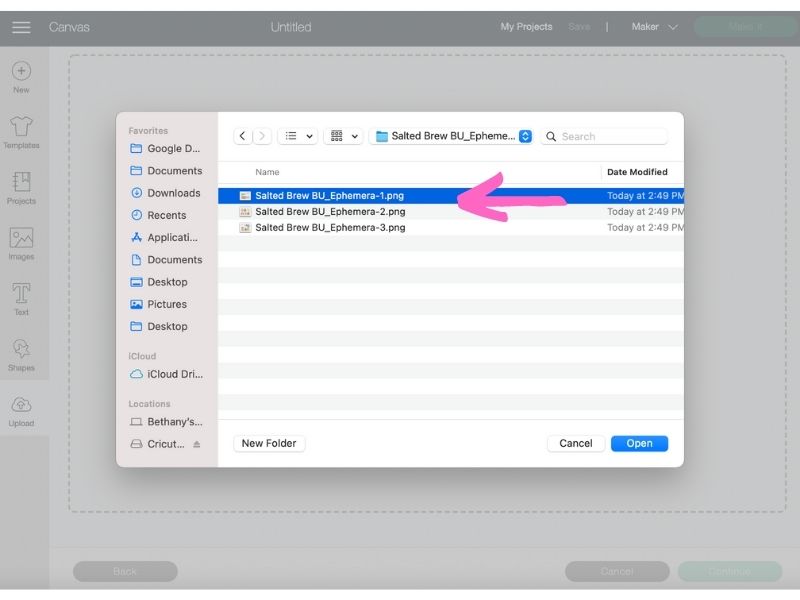
10. Click on the file you converted to open in Design Space.
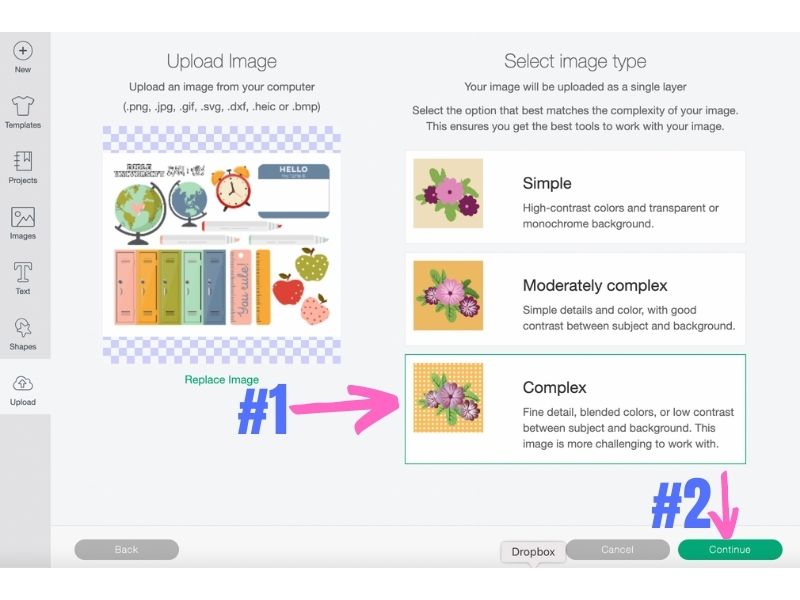
11. You will now select the image type. I like to click “Complex” most of the time. Then click “Continue.”
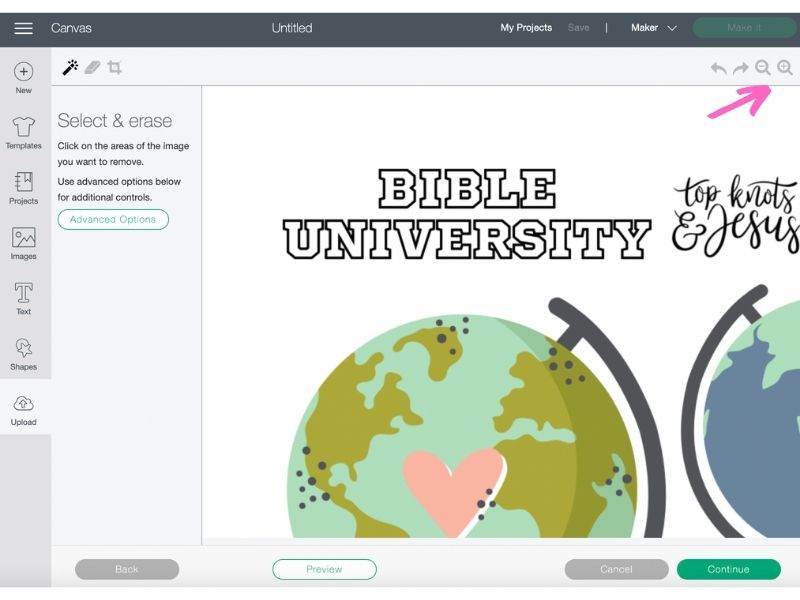
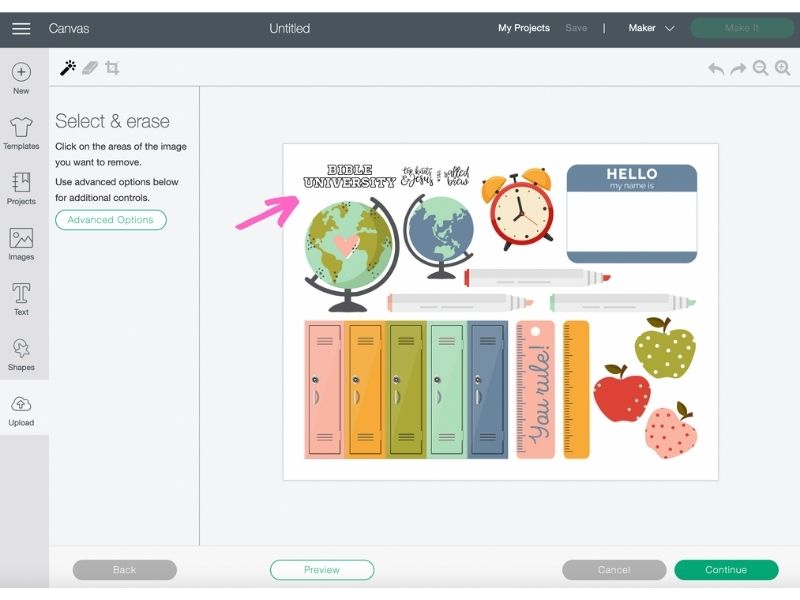
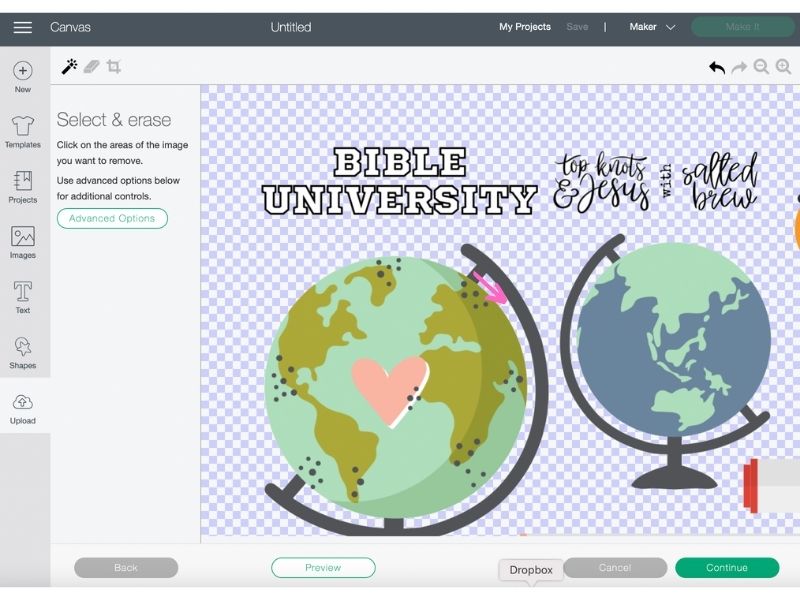
12. Use the zoom in and out feature to help you edit the file to prepare it for cutting. Click “-“ to see entire image for next step.
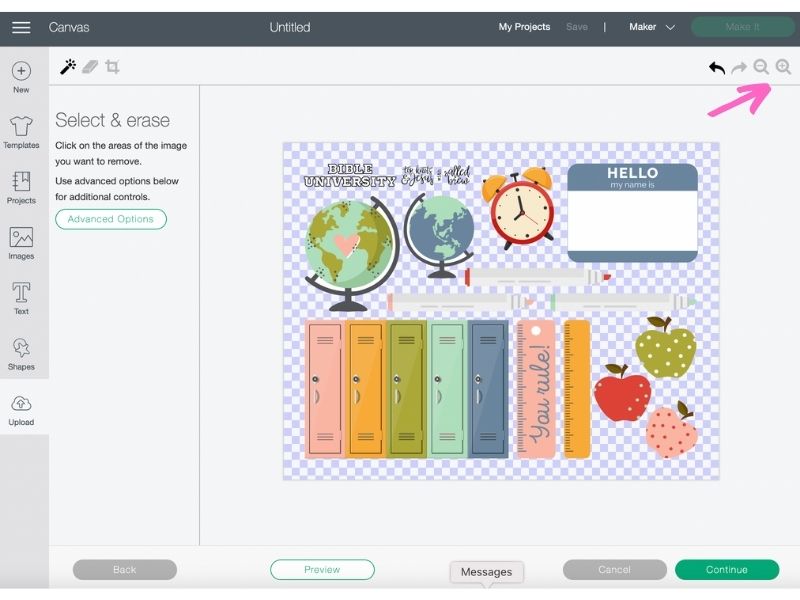
13. Click the background to remove it so Design Space knows where to cut the images.
14. Click the “+” to zoom in to remove background in more intricate areas for next step.
15. Continue to click background in more intricate areas as needed depending on the design.
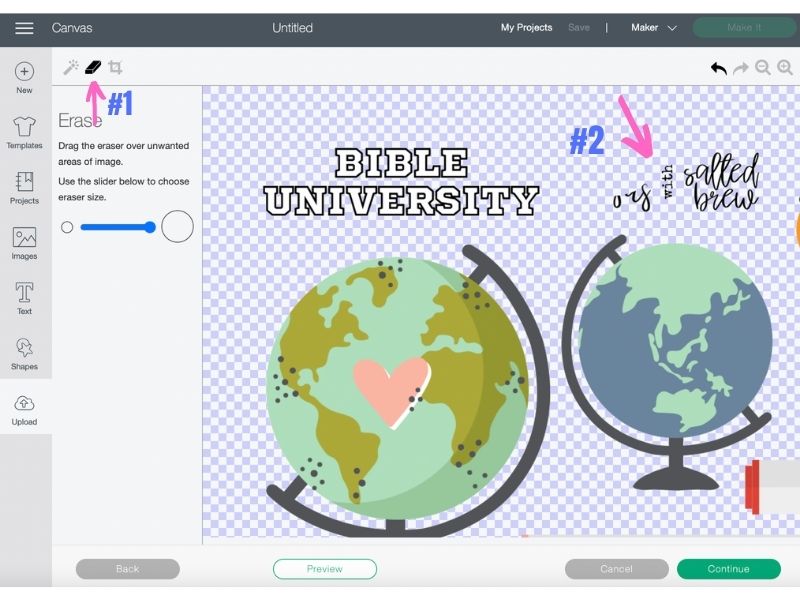
16. Click the eraser and then remove any background you do not want to cut out.
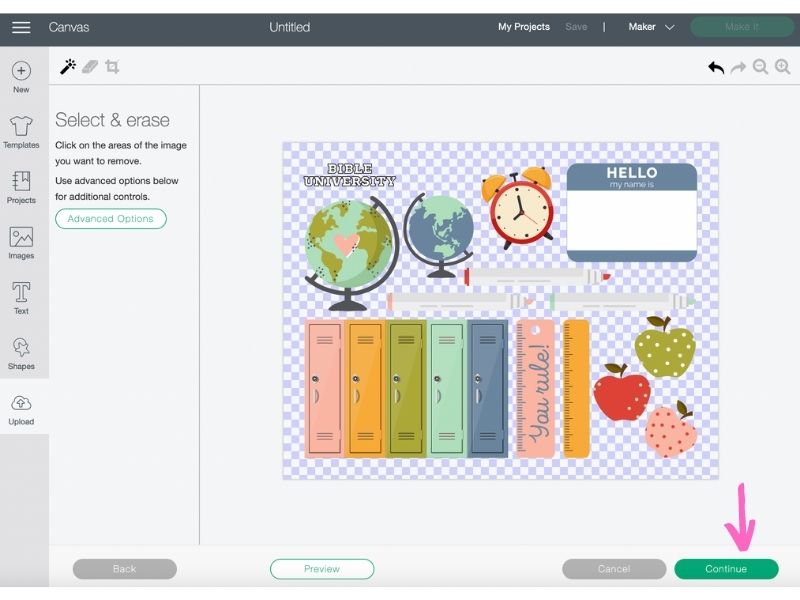
17. Once you are finished preparing the design, click “Continue.”
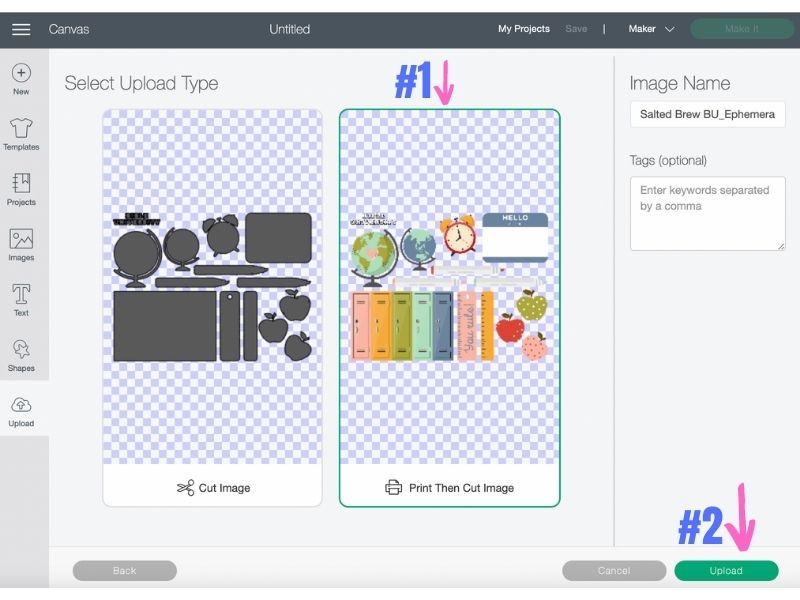
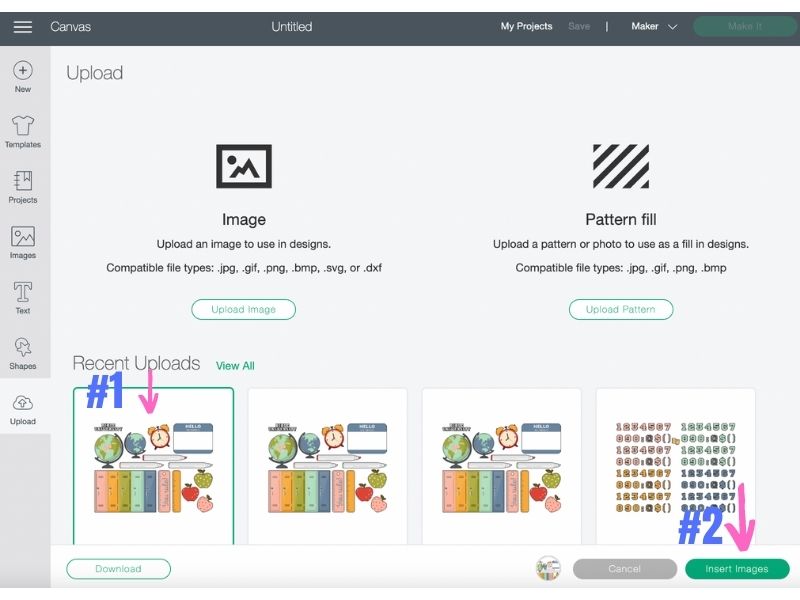
18. Click “Print Then Cut Image” option and then click “Upload.”
19. Select the image we edited and then click “Insert Images.”
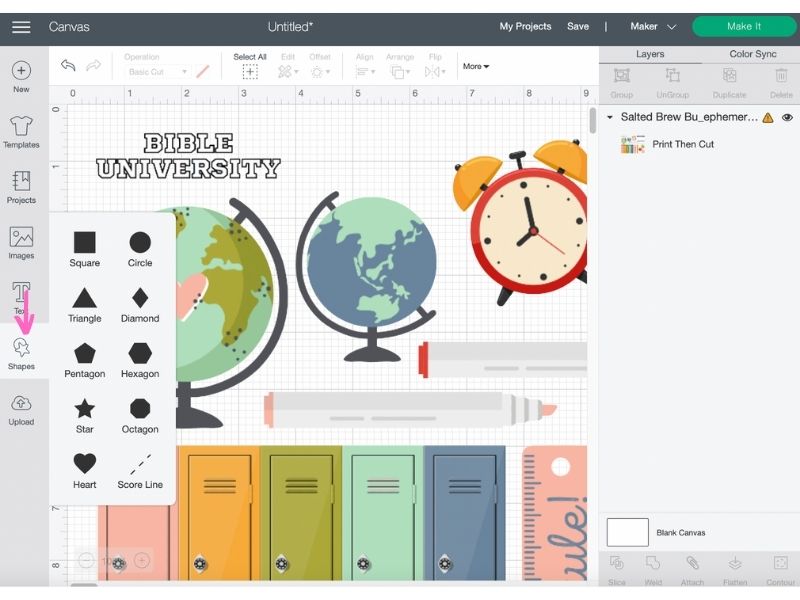
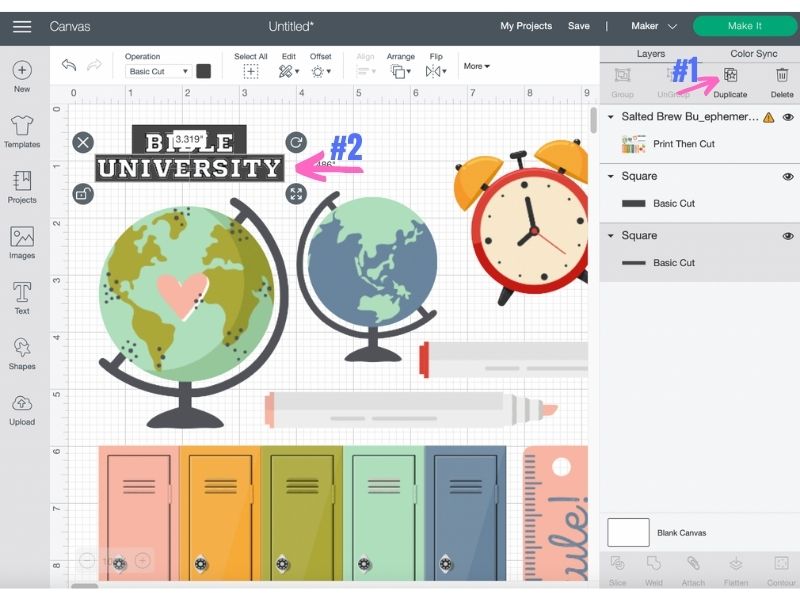
20. If you have a part of the design that you want to cut as one big sticker instead of individual elements, follow these next steps. For example with a title such as the one below, “Bible University,” I want to cut it out as one big sticker instead of separate letters. To do so, click “Shapes” and then “Square.”
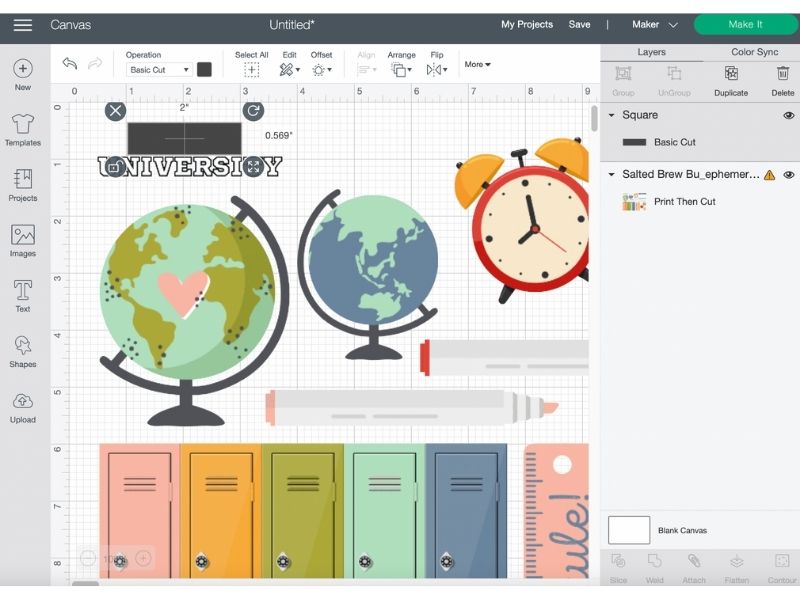
21. Adjust and move the square to line it up with the title.
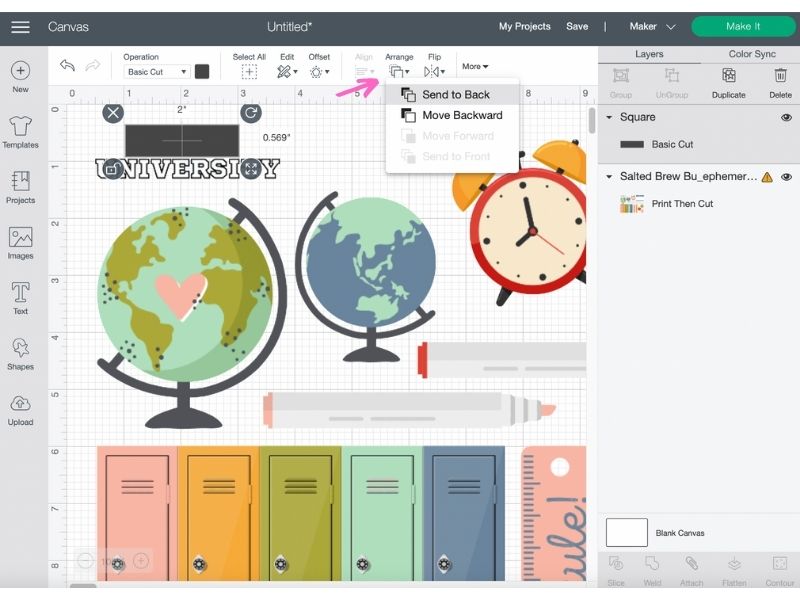
22. Click “Arrange” and “Send to Back” to be sure you have the right placement.
23. Click “Duplicate” for the rectangle previously made if needed depending on design and align where needed.
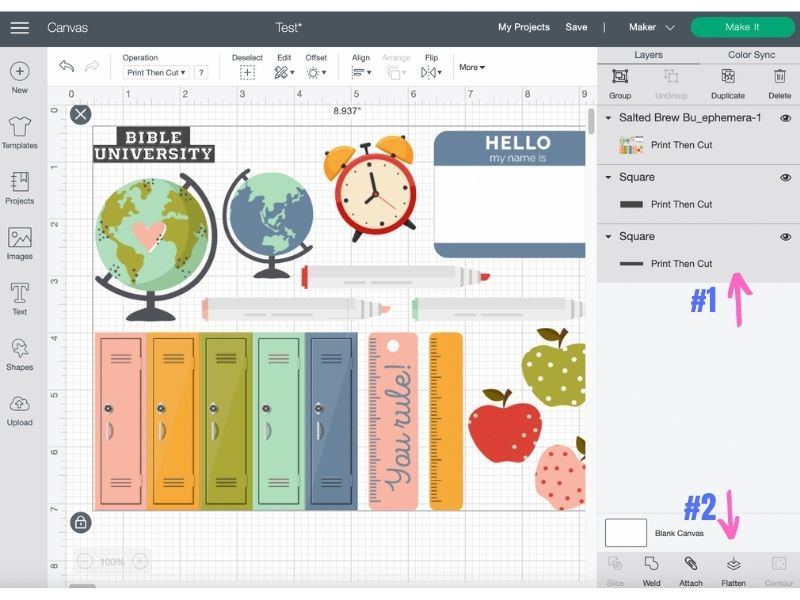
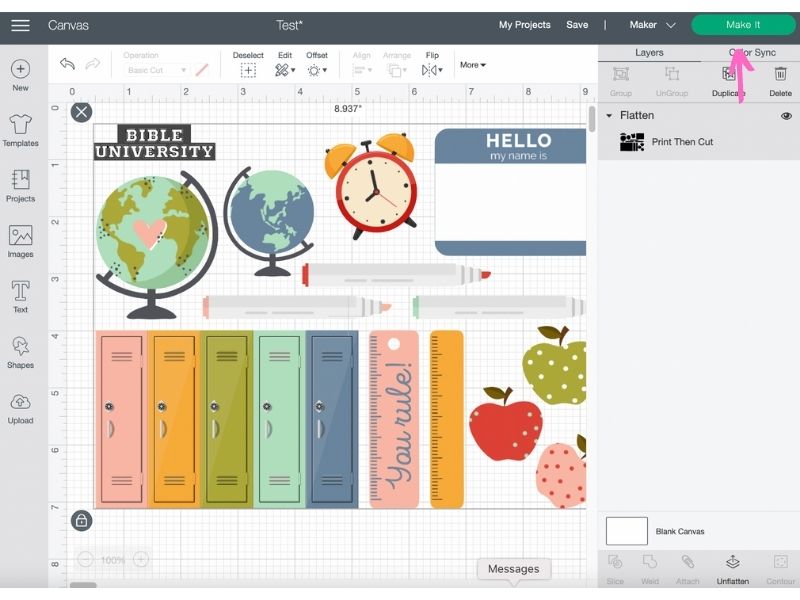
24. Select all the layers on the right and be sure they are all highlighted grey. Then click “Flatten.”
25. Sometimes you may get an orange triangle on the layers to the right warning your cut size is too large for your machine selection. If this happens, you will need to click “More” and then adjust the size settings. Once everything is complete, you are ready to click “Make It.”
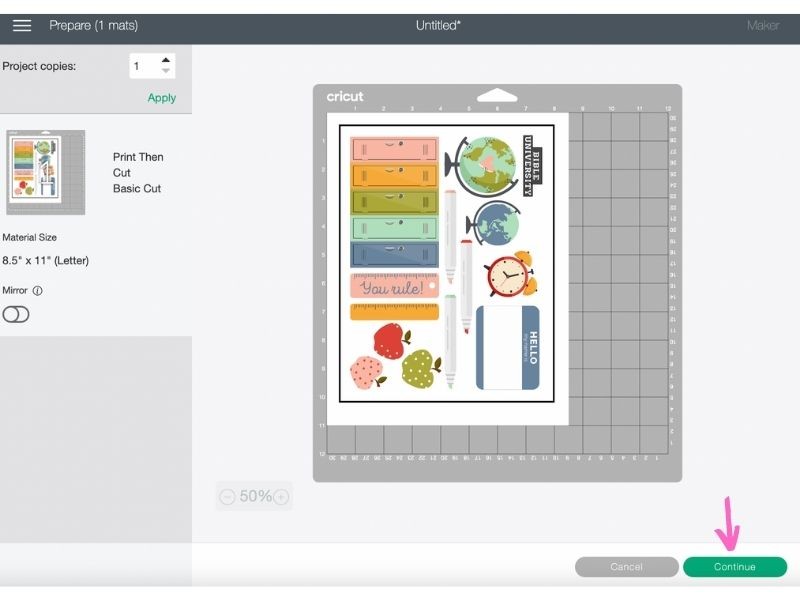
26. You will see a preview of the printable on a cutting mat so you know how to align your printable. Click “Continue.”
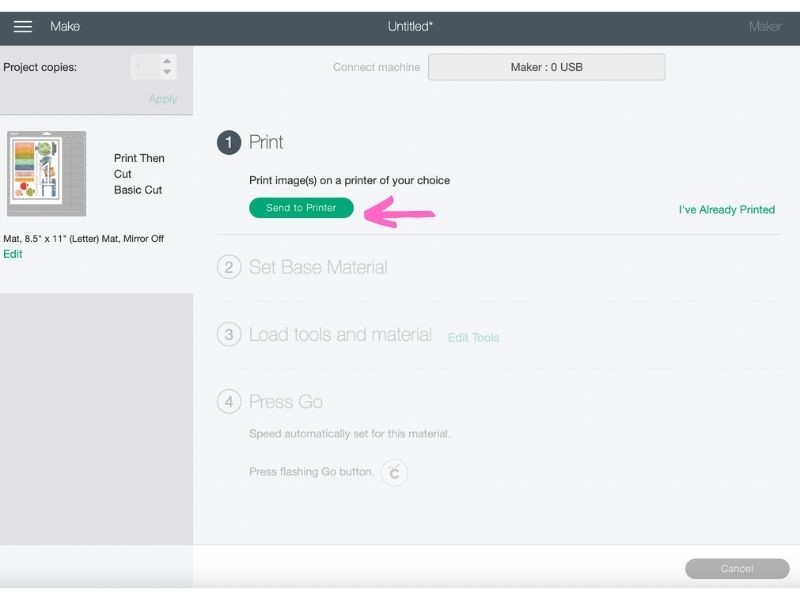
27. Click “Send to Printer.” (You must print from within Design Space in order to have the extra markings that your machine will scan for accurate cuts.)
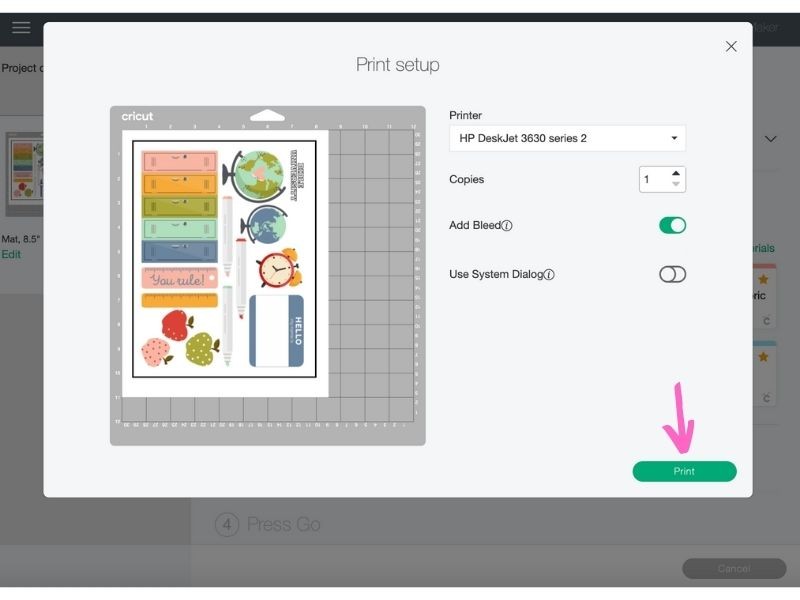
28. Check printer settings and click “Print.”
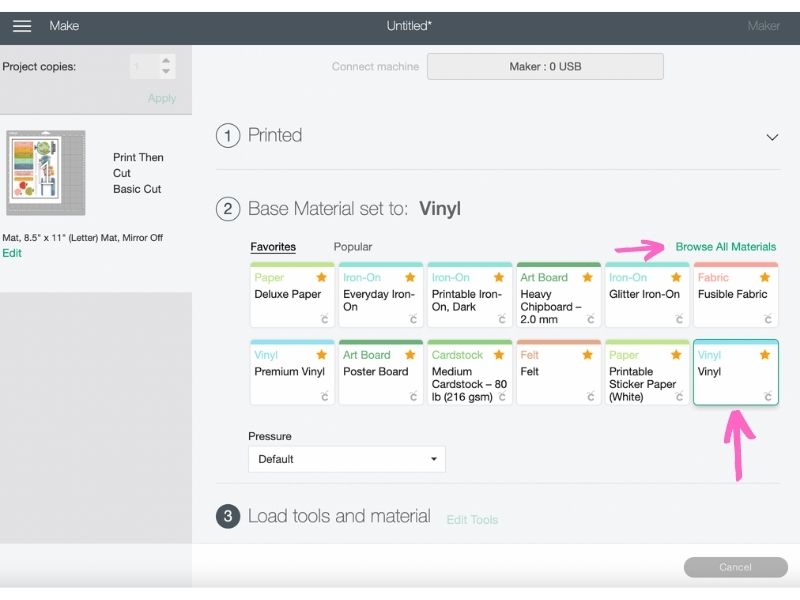
29. Click “Browse All Materials” and Select “Vinyl.”
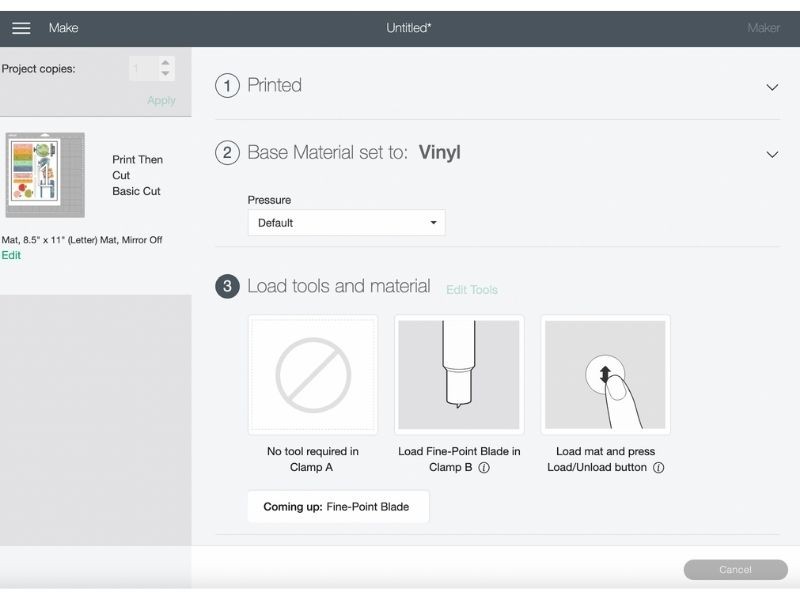
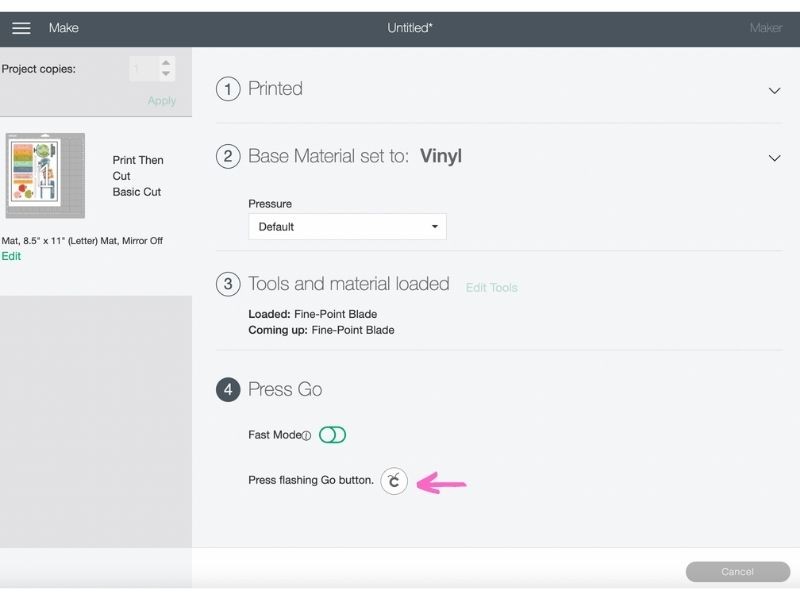
30. Place your printed file onto the cutting mat and follow the directions in number 3. Be sure you have the correct tool loaded in your machine and then load the mat.
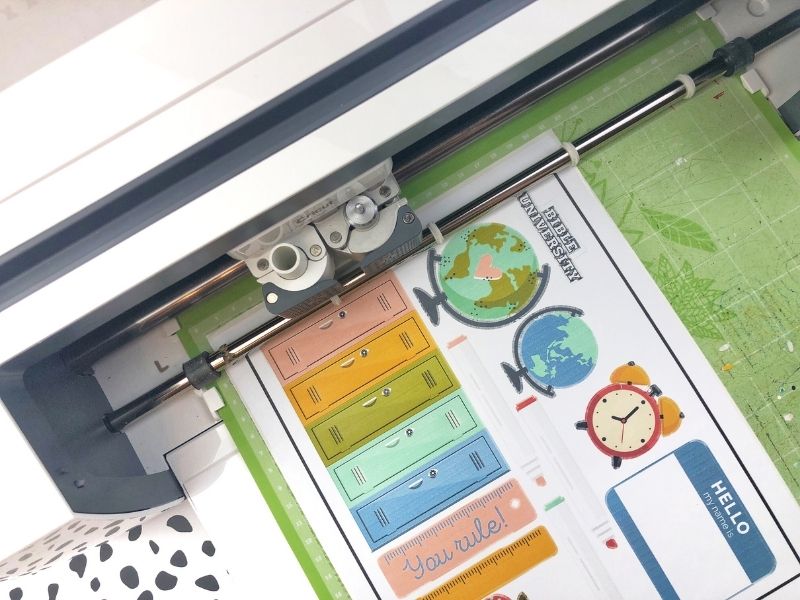
31. Once your mat is loaded, click the flashing Go button on your cutting machine to begin cutting out your stickers.
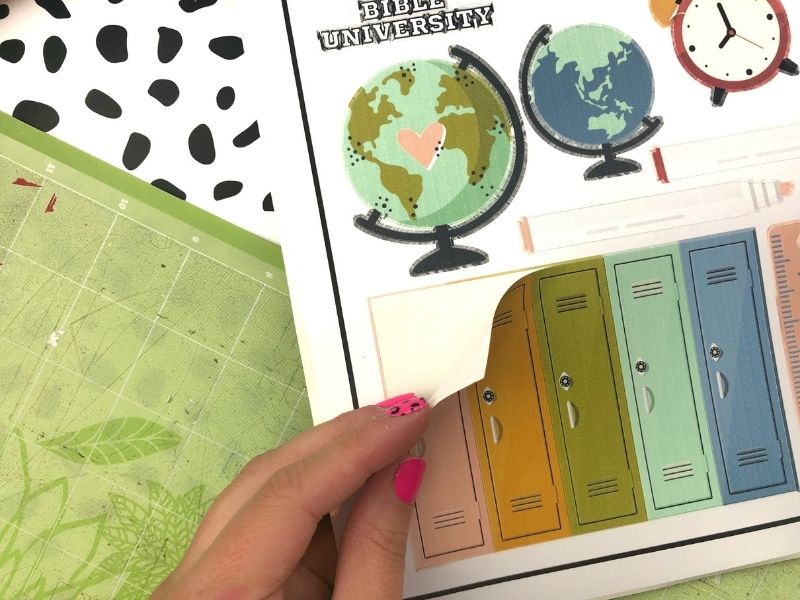
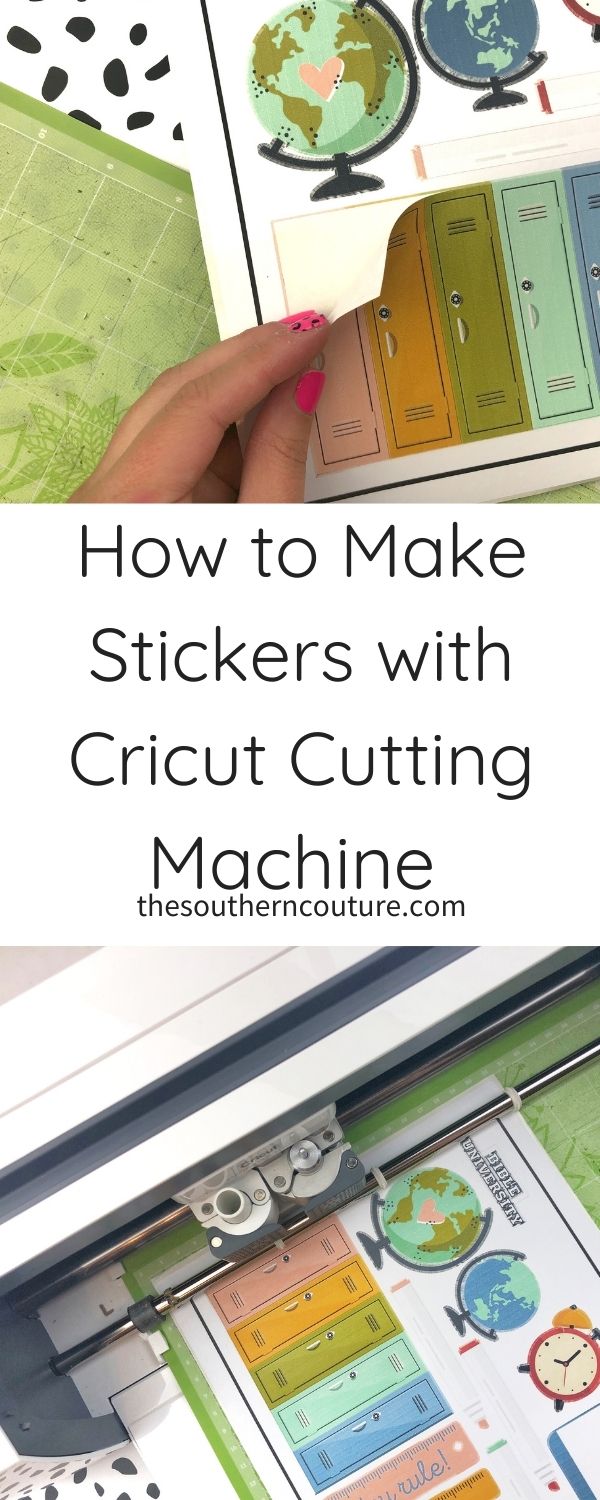
Once the Cricut cutting machine has finished, unload your mat and pull the sticker sheet off the cutting mat. Now you can use your stickers wherever you please! How fun is that?!
Now please don’t hesitate to ask me any questions you may have about making your stickers with the Cricut cutting machine. Leave them in the comments below. And don’t forget to check out the Cricut cutting machines HERE. I also have lots of other Cricut blog posts to give you more information and tutorials.
ENROLL NOW IN MY 5 DAY BIBLE JOURNALING ECOURSE FOR FREE!

Get exclusive tips and tricks with my 5 Day eCourse available exclusively to subscribers!
